Everything you need to know — from demo and waterproofing to setting tile, grouting, and sealing — written for homeowners doing this for the first time, with zero fluff and zero skipped steps.
Tiling a shower involves 10 core steps: demolition → framing inspection → cement backer board → waterproofing membrane → layout planning → floor tile → wall tile → grouting → caulking → sealing.
The entire project typically takes 3–5 days for a DIYer. Professional installation runs 6–8 hours. The most critical — and most commonly skipped — step is waterproofing. Skip it and no amount of beautiful tile will save you from mold, rot, and expensive structural damage down the road.
Let's be honest about something most tiling guides don't say upfront: tiling a shower is one of the more demanding home improvement projects a beginner can take on. It's not impossible — thousands of American homeowners do it successfully every year — but it requires patience, precision, and a genuine respect for waterproofing. Get those three things right, and you'll have a shower that looks beautiful and lasts for decades. Get them wrong, and you're looking at hidden water damage, mold behind the walls, and an expensive professional repair bill.
This guide covers the entire process — from the moment you pick up a pry bar to the moment you turn on the water for the first time. We're not going to skip the hard parts or rush through the steps that most DIY guides gloss over. If you follow this carefully, you'll end up with a shower you're genuinely proud of — and more importantly, one that stays watertight for years to come.
📊 Real-World Cost Context: According to Angi's 2026 data, the average cost to professionally tile a shower is $2,700, ranging from $1,800 to $5,000+ depending on tile choice and shower size. DIY materials average around $1,390 per HomeAdvisor — saving $1,300–$3,600 in labor. That said, DIY projects typically take 3–5 days versus 6–8 hours for a professional. The savings are real, but so is the time commitment and the skill requirement for waterproofing.
What's in This Guide
- Before You Start: Planning & Reality Check
- Tools & Materials You'll Need
- Step 1: Demo & Prep the Space
- Step 2: Install Cement Backer Board
- Step 3: Waterproof the Shower
- Step 4: Plan Your Tile Layout
- Step 5: Tile the Shower Floor
- Step 6: Tile the Shower Walls
- Step 7: Cut Tiles Around Fixtures
- Step 8: Grout the Tile
- Step 9: Caulk Corners & Transitions
- Step 10: Seal the Tile & Grout
- 8 Mistakes Beginners Make
- Choosing the Right Shower Tile
- Frequently Asked Questions
Before You Start: Is This Project Right for You?
Before committing to tiling a shower yourself, be honest about two things: your skill level and your timeline. This is not a weekend project. A first-time tiler working on a standard 36"×36" shower stall should plan for 3 to 5 full working days, not including mandatory cure times when you simply have to wait. Here's a realistic timeline:
- Day 1: Demolition, framing inspection, cement board installation
- Day 2: Waterproofing membrane (two coats with 4–12 hours dry time between)
- Day 3: Layout planning, floor tiling, begin wall tiling
- Day 4: Complete wall tiling — 24-hour cure before grouting
- Day 5: Grouting, caulking, sealing — 72-hour cure before shower use
If this is your only bathroom, have a plan for showering elsewhere during this window. Nothing creates pressure and rushed decisions like needing to get the shower operational by a hard deadline.
⚠ When to Call a Professional Instead: If you find structural damage — rotted studs, cracked joists, significant mold — during demolition, stop and call a contractor before proceeding. Similarly, if your shower requires new plumbing rough-in or significant subfloor work, that's professional territory. Waterproofing and tile on top of compromised structure is money wasted.
How Much Tile Do You Need?
Measure each wall and the floor, calculate total square footage, then add 15% overage for cuts and waste. For complex patterns like herringbone or diagonal, increase to 20%. Natural stone tiles come from specific production lots — if you run short mid-project and that lot is sold out, finding a perfect match can be impossible. Always order more than you need and store the remainder after installation.
A standard 3'×5' shower with 8-foot walls has approximately 88–100 square feet of tile surface area, combining walls and floor. A simple walk-in shower stall (36"×36") with 7-foot walls has around 63–70 square feet. Budget accordingly.
Tools & Materials You'll Need
Having every tool ready before you start is essential on a project like this. Running to the hardware store mid-installation when thinset is beginning to set is exactly how costly mistakes happen. Here's the complete list for a first-time shower tiling project:
Tools
- Wet saw (tile saw) or angle grinder with diamond blade
- Notched trowel (1/4"×3/8" V-notch for walls; 1/2" square-notch for floors)
- Margin trowel
- Grout float (rubber)
- Large sponges (at least 4)
- Buckets (at least 3)
- 4-foot level and 2-foot level
- Tape measure
- Chalk line
- Pencil and permanent marker
- Tile spacers (1/8" for walls; 1/16" for mosaics)
- Rubber mallet
- Backerboard scoring knife
- Power drill with corrosion-resistant screws
- Caulking gun
- Diamond hole saw (for fixture cutouts)
- Safety glasses, gloves, N95 dust mask
- Drop cloths and plastic sheeting
Materials
- Tile (wall + floor, with 15% overage)
- Cement backer board (Durock, HardieBacker, or WEDI)
- Alkali-resistant fiberglass mesh tape
- Waterproofing membrane (liquid RedGard or sheet Schluter-Kerdi)
- Polymer-modified thinset mortar (white for light tile)
- Tile spacers
- Grout (sanded ≥1/8" joints; unsanded for tighter joints)
- Epoxy grout (recommended for shower floors)
- 100% silicone caulk, color-matched to grout
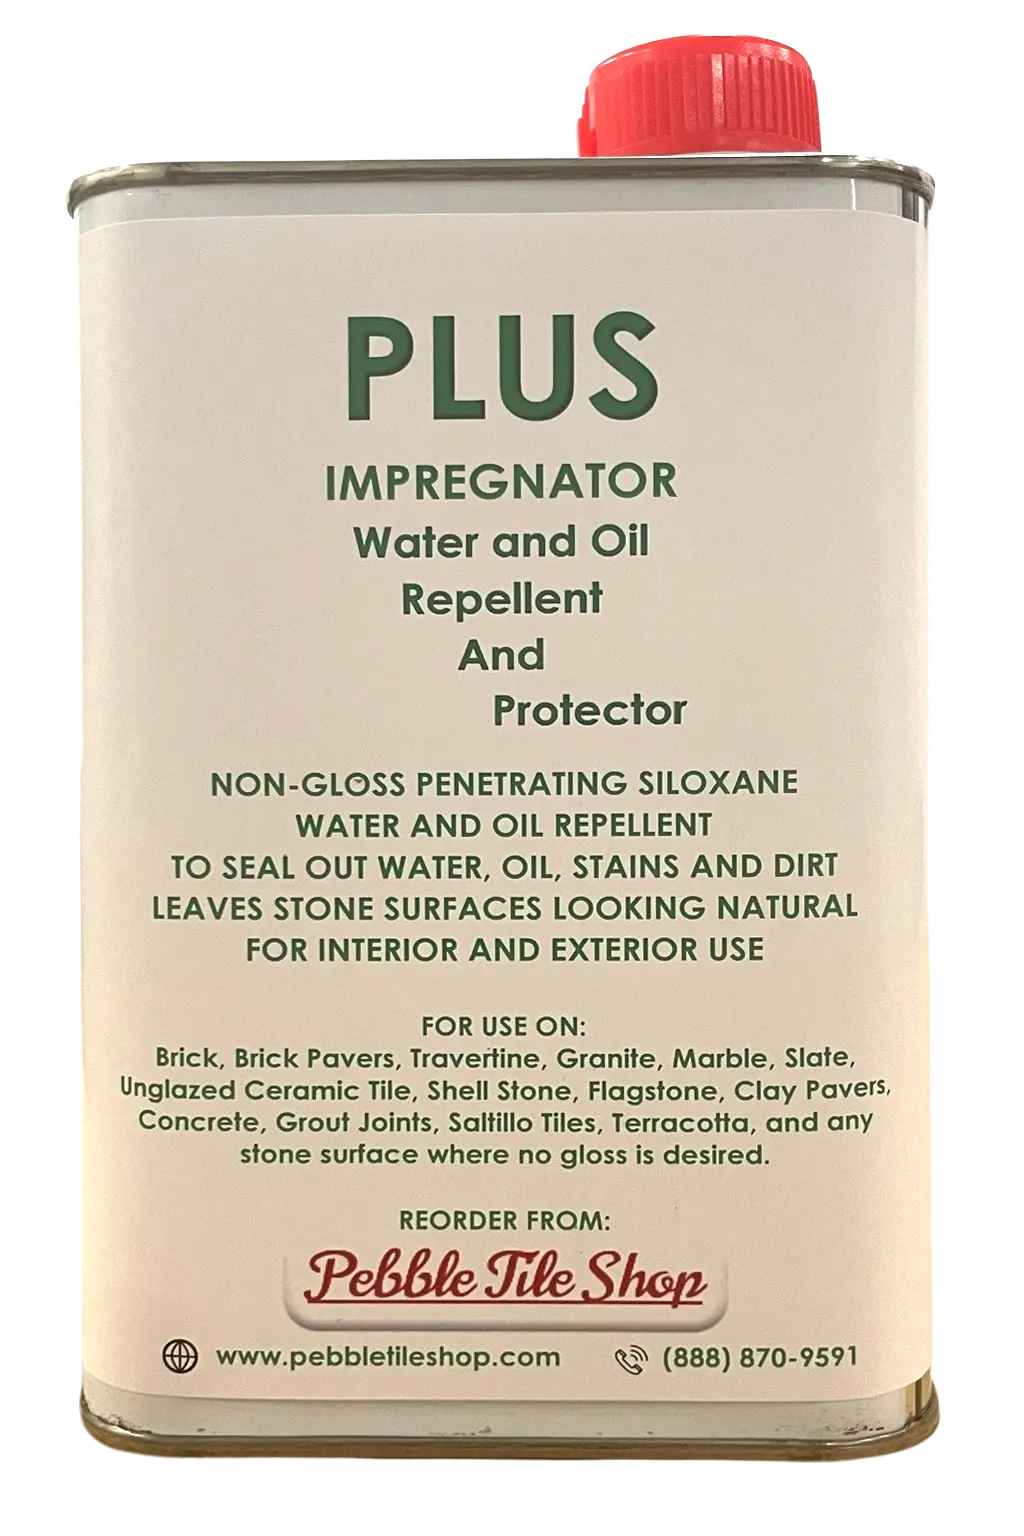
- Penetrating stone sealer (for natural stone tile)
- Grout sealer
- Corrosion-resistant cement board screws
- Backer board waterproof sealant
- Bullnose or trim tiles for exposed edges
- Corner/trim profiles (Schluter JOLLY or similar)
📊 Material Cost Breakdown (2026): Standard ceramic and porcelain tile material runs $10–$25 per square foot. Natural stone runs $15–$45. Backer board, waterproofing, thinset, grout, and accessories typically add $300–$600 to the total. Labor — if hiring any portion out — runs $7–$15 per square foot per Angi's 2026 data. Pebble shower tile averages $40–$70 per square foot installed professionally.
Demolition & Preparing the Space
Estimated time: 2–4 hours. This sets the structural foundation for everything that follows. Do not rush through it.
Protect Everything That's Staying
Before swinging a single tool, protect everything that isn't being replaced. Cover your toilet, vanity, and any fixtures staying in place with plastic sheeting and tape. If you're tiling above a tub, cover the tub surface with a tarp and a piece of plywood — broken tile chips are sharp and fall with real force, and chipping a porcelain tub can add hundreds of dollars to your project unexpectedly. Shut off the water supply to the shower. Turn off the HVAC system to prevent fine tile dust from circulating through your home. Hang plastic sheeting over doorways. Wear safety glasses and your dust mask from this point forward — demolition creates significant airborne particles.
Removing Old Tile
Work from top to bottom. Using a hammer and cold chisel, break the grout lines first, then pry tiles away from the wall. Work in small sections rather than trying to remove large areas at once. If the old backer board behind the tile is damaged — or if the previous installer used standard drywall (which should never be used in a shower) — remove everything down to the wall studs. Don't try to save a bad substrate. Starting fresh with correct materials costs less than fixing a compromised installation later.
⚠ Older Homes Warning: If your home was built before 1978, tile adhesive and backer materials may contain asbestos. Before demolishing any shower from that era, arrange for asbestos testing from a certified inspector. Disturbing asbestos without proper containment is a serious health hazard and a code violation in most US states.
Inspecting the Wall Framing
With the walls stripped to the studs, inspect every piece of framing carefully. Press on each stud with your hand — any that feel soft, spongy, or flex noticeably have absorbed moisture and must be replaced before you proceed. Rotted wood is the single most common discovery in old shower demolitions, and it's the kind of thing that turns a $1,500 project into a $4,000+ one if ignored.
Also check that the stud plane is flat. Hold a long straightedge across multiple studs — any stud protruding more than 1/8 inch beyond its neighbors needs to be shimmed or planed flat. An uneven stud plane causes tile lippage — where tiles sit at different heights — which is both visually obvious and potentially a trip hazard on floors.
Preparing the Shower Floor Area
For a stand-alone shower (not tiling above a tub), inspect the shower pan substrate. For concrete slabs, check for cracks and repair with hydraulic cement. The floor must slope toward the drain at a rate of 1/4 inch per linear foot — this is required by most US building codes and essential for water to drain without pooling. If your floor doesn't slope correctly, you'll need to build up a mortar bed to create the proper pitch before any tile is installed.
Install Cement Backer Board
Estimated time: 2–3 hours. This is your tile's permanent foundation — flat, solid, and correctly gapped.
Standard drywall — even "moisture-resistant" greenboard — is not appropriate for shower walls. It absorbs moisture over time and will eventually fail, taking your tile with it. Cement backer board (also called cement board or cementitious backer unit) is the correct substrate for wet areas. Popular products include Durock, HardieBacker, and WEDI. WEDI panels are a premium foam-based option that is inherently waterproof and requires no separate membrane — an excellent choice if your budget allows.
Measuring and Cutting
Measure each shower wall and cut the backer board to size using a scoring knife and a straightedge. Score the board firmly (multiple passes), then snap it along the scored line and cut the back to separate the pieces. Use a hole saw to cut out openings for shower valve stems and the showerhead location. Measure these cutouts precisely — ragged or oversized holes at fixture locations look unprofessional and reduce the effectiveness of your waterproofing at those points.
Fastening the Board
Fasten the backer board to the studs using corrosion-resistant cement board screws — not standard drywall screws, which will rust in a wet environment. Space screws every 6–8 inches along each stud. Leave a 1/8 inch gap between boards to allow for thermal expansion (use a pencil as a spacing guide). Leave a 1/4 inch gap at the bottom of wall boards above the shower pan — never run cement board directly to the floor.
Taping the Seams
Apply alkali-resistant fiberglass mesh tape over every seam and inside corner. Embed the tape in a thin coat of thinset mortar and smooth it flat. Regular drywall joint tape is not alkali-resistant and will deteriorate behind tile — use only fiberglass mesh tape rated for cement board. Allow thinset over the seams to cure 24 hours before applying waterproofing.
✔ Pro Tip — Stagger Your Seams: Don't let all horizontal backer board seams land on the same level across different walls. Staggered seams are structurally stronger and reduce the risk of cracks telegraphing through to the tile surface over time.
Waterproof the Shower
Estimated time: 1 hour application + 4–24 hours dry time per coat. This is the most important step in the entire project — read this section twice.
More shower failures stem from inadequate waterproofing than from any other single cause. Tile and grout are water-resistant but they are not waterproof. Water penetrates grout joints over time — especially as grout ages and develops micro-cracks. Without a membrane behind the tile, that water reaches the framing, sits there, and creates mold, rot, and structural damage that may take years to manifest but will cost thousands of dollars to fix when it finally does.
📊 The Cost of Skipping Waterproofing: Professional mold remediation in a bathroom costs between $1,100 and $3,300 per Angi's 2026 data. Water damage reaching wall framing and subfloor can run $5,000–$15,000+. The cost of a proper waterproofing membrane? $450–$750. This is the easiest financial decision in this entire project.
Two Types of Waterproofing Membrane
Liquid-applied membranes (RedGard, HydroGuard, Laticrete Hydro Ban) are painted or rolled directly onto the cement board. They're flexible when cured, DIY-friendly, and cost-effective. Apply two coats — the first coat cures from wet pink/red to dark, indicating readiness for the second coat. Apply the second coat perpendicular to the first for uniform coverage. Use embedded fiberglass mesh tape at all corners and seams for an extra reinforcement layer. Allow 24 hours full cure before tiling.
Sheet membranes (Schluter-Kerdi, USG Durock Tile Membrane) are thin polyethylene or fleece-backed sheets bonded to the substrate with unmodified thinset. They create a more uniform membrane thickness and are the professional preference for large or complex shower installations. They require careful attention to overlapping and bonding at seams, and the manufacturer's preformed corner pieces are essential for proper watertight angle transitions.
✔ High-Risk Zones: Double-coat liquid membranes at all inside corners, seams, and around every screw penetration — these are the highest-risk points for water infiltration. Using embedded mesh tape in the membrane at inside corners adds a critical reinforcement layer that prevents cracking at the most vulnerable transition points.
Waterproofing the Shower Floor
If building a shower floor (not using a prefabricated pan), apply the liquid membrane to the full floor surface and pay particular attention to the connection around the drain flange. This junction between your waterproofing and the drain is a common failure point. Most quality shower drains have a bonding flange designed specifically to integrate with sheet or liquid membranes — use it. Do not bypass it. Allow the floor waterproofing to cure completely before setting any tile.
Plan Your Tile Layout
Estimated time: 1–2 hours. This planning prevents expensive, ugly surprises mid-installation.
One of the most common beginner mistakes is diving straight into setting tile without planning the layout first. The result is often narrow "sliver" tiles — less than half a tile wide — at the most visible spots in the shower. A bit of planning prevents this entirely.
Finding Your Reference Lines
On the most prominent shower wall (usually the back wall, visible from the bathroom door), measure the total width and mark the center point. Use a level to draw a perfectly vertical plumb line from floor to ceiling through that center. This is your primary vertical reference — all tiles on this wall radiate symmetrically left and right from this center line.
Next, measure from the floor up to determine where your first full tile row begins. Ideally, the first full row starts at the top of the shower curb or pan edge, with a half-tile or larger cut visible at the ceiling. If the math results in less than a 2-inch sliver at the top, shift the layout up by half a tile height. Partial tiles at the top are far less visible than partial tiles at eye level or the floor.
Dry-Lay Before You Set
Before mixing any thinset, lay out a row of tiles on the floor in front of each wall — dry, without adhesive — to visualize the pattern. This dry run shows you exactly where cuts fall and lets you adjust without consequences. For the floor, find the center of the drain and work outward. Small layout adjustments at this stage can dramatically improve the finished appearance of the installation.
Tile the Shower Floor
Estimated time: 2–4 hours + 24-hour cure before grouting. Always tile the floor before the walls.
Always tile the floor first, then the walls. When you set wall tile, the bottom row rests on top of the floor tile, creating a clean visual line and a naturally watertight overlap. Tiling walls first creates an awkward gap where wall tile meets the floor and forces difficult precision cuts to fit floor tile beneath wall tile edges.
Mixing Thinset
Mix polymer-modified thinset mortar to a smooth, peanut butter-like consistency — thick enough to hold a peak, fluid enough to spread. Add powder to water (not reverse) and mix with a drill and paddle mixer for 3–5 minutes. Let the mixture slake (rest) for 5–10 minutes, then remix briefly. This slaking period allows bonding agents to fully activate. Use white thinset under any light-colored tile, translucent glass, and all natural stone — gray thinset telegraphs through lighter tile and creates visible discoloration.
Setting Floor Tiles
Working in small 2–3 square foot sections at a time, spread thinset on the floor with a 1/2 inch square-notch trowel held at 45 degrees, combing the thinset in one direction only to create uniform parallel ridges. Back-butter each floor tile (apply a thin skim coat of thinset to the tile back) before setting it into the floor thinset. This is especially important for natural stone, porous ceramic, and large-format tiles — it ensures full adhesive contact with no air voids that can lead to cracking over time.
Press each tile firmly into the thinset with a slight twisting motion. Place tile spacers immediately. Check level every 3–4 tiles with your level. Use a rubber mallet to tap high tiles gently down — never force tiles. Work outward from the drain toward the walls, maintaining your slope. Allow floor tiles to cure a minimum of 24 hours before walking on them or beginning wall installation.
✔ Check Thinset Coverage: After setting 4–5 tiles, pull one up and inspect the back. Thinset should cover at least 80% of the tile surface in dry areas, and 95% in wet areas like shower floors. Bare patches mean your thinset ridges aren't tall enough or you're not back-buttering sufficiently — correct this before continuing.
Tile the Shower Walls
Estimated time: 4–8 hours depending on shower size and tile format. Constant level and plumb checking is non-negotiable.
Start with the back wall — it's the most visible surface and the one that sets the visual tone for the entire shower. If the back wall is perfect, the side walls will follow naturally.
Using a Working Ledger
Cut a scrap board the same length as one tile row. Temporarily screw this ledger horizontally to the wall at the height of your first full tile row. This acts as a support shelf, preventing tiles from sliding down while the thinset sets. Remove the ledger after the first row has cured (4–6 hours), then fill in the bottom cut row once the rest of the wall is complete.
Setting Wall Tiles
Apply thinset to the wall with a 1/4"×3/8" V-notch trowel in sections no larger than you can tile in 15–20 minutes — thinset that has developed a dry skin cannot bond properly. Back-butter large-format tiles and all natural stone. Start at your center plumb line and work outward toward the corners in both directions, maintaining level rows constantly. Check plumb and level every 3–4 tiles.
Handling Corners
In all inside corners, leave a clean 1/8 inch gap — these joints will be caulked, not grouted (more on this in Step 9). For outside corners, use bullnose tile (one finished, rounded edge) for a traditional look, or metal Schluter trim profiles for a sharp, contemporary transition. Schluter profiles come in multiple finishes to complement your fixture hardware and create a professional-looking edge without any tile-cutting complexity.
Cut Tiles Around Fixtures & Openings
Estimated time: 1–2 hours. Accuracy here defines how professional the finished installation looks.
Cuts around shower valves, showerhead arms, and built-in niches are where beginner installations most visibly reveal themselves. Rough or inaccurate cuts around fixtures are a clear sign of inexperience — and unfortunately, they're at eye level where everyone can see them.
Circular Cutouts for Valves and Showerheads
Use a diamond hole saw sized to fit beneath the fixture trim plate. Measure the exact center of the pipe, mark it on the tile face, and drill from the front of the tile at slow speed with water cooling. Never drill dry — heat without water cooling will crack the tile. If you don't own a hole saw, score carefully with an angle grinder and remove the waste with tile nippers. Take it slow — this is not a place to rush.
L-Shaped and Notch Cuts
For cuts around corners and recessed valve boxes, mark cut lines on the tile face with a permanent marker. Make two straight cuts with the wet saw, stopping just before the corner where the cuts intersect. Finish the inside corner with a grinder or nippers. Take your time — chipped, rough edges are sometimes visible even beneath trim plates and escutcheons.
Shower Niches
Built-in niches should have been framed and waterproofed before tiling. Apply an extra coat of liquid membrane to the niche interior, paying specific attention to inside corners. Tile the niche back wall first, then the sides, then the floor of the niche, allowing each section to cure. Using a different tile in the niche — a mosaic, a contrasting color, or a natural pebble tile — creates a beautifully considered accent detail that elevates the entire shower.
Grout the Tile
Estimated time: 2–3 hours application + 72-hour full cure. Wait the full 24 hours after the last tile is set before grouting.
Remove all tile spacers before grouting. Mix grout to a smooth peanut butter consistency — no dry lumps. Let it slake 5–10 minutes and remix. Never add water to grout after the initial mix: it weakens strength and causes color inconsistency. Mix in smaller batches if needed rather than reviving a stiffening batch with water.
Choosing the Right Grout Type
- Unsanded grout: For joints narrower than 1/8 inch. Used primarily on wall tile with tight joints. Won't scratch polished stone surfaces.
- Sanded grout: For joints 1/8 inch and wider. Required for floor tile. The sand aggregate adds compressive strength.
- Epoxy grout: The professional recommendation for shower floors. Non-porous, mold-resistant, never needs sealing. Harder to work with (faster set time) and more expensive but worth it in high-moisture applications.
Applying Grout
Working in small 4–6 square foot sections, spread grout diagonally across the tile surface with a rubber grout float held at 45 degrees. Press firmly to pack grout fully into the joints. Remove excess by holding the float near-perpendicular to the wall, dragging diagonally across the joints. After 15–20 minutes, clean the tile surface with a barely damp sponge (wrung as dry as possible), wiping diagonally and rinsing frequently. Change rinse water when it turns cloudy. Several light passes outperform one aggressive scrub — heavy sponge pressure can pull grout out of the joints.
⚠ Grout Haze: A milky haze on tile after grouting is normal and clears as grout dries. After 24-hour cure, buff off remaining haze with a dry cloth. On natural stone, use only stone-safe haze removers — standard acidic grout haze cleaners will etch marble, travertine, and limestone permanently.
Caulk the Corners & Transitions
Estimated time: 1 hour + 48-hour cure before first use. Every inside corner gets caulk — not grout. This rule is absolute.
Every inside corner in a shower — where wall meets wall, where wall meets floor, where tile meets the tub rim — must be caulked with 100% silicone, not grouted. This is one of the rules that separates professional-quality installations from amateur ones, and it's non-negotiable from a waterproofing standpoint.
Here's the engineering reason: the shower assembly expands and contracts with temperature changes. Grout is rigid and will eventually crack at corners where two planes meet under thermal stress. Silicone caulk is flexible — it absorbs that movement without cracking, maintaining the watertight seal indefinitely. Grouted corners crack; silicone caulk flexes. This isn't a preference — it's physics.
Applying Silicone Caulk Cleanly
Tape both sides of each corner joint with painter's tape. Apply a smooth, continuous bead of 100% silicone caulk (not latex or acrylic) into the joint. Press it firmly into the corner with a wet finger or a caulk finishing tool, smoothing it in one single pass. Remove the painter's tape immediately while the caulk is still wet, pulling at a 45-degree angle. Allow 48 hours of cure before any water contact.
✔ Key Caulk Locations: All four vertical inside wall corners, the joint where wall tile meets floor tile around the entire shower perimeter, the joint where tile meets the tub rim or shower curb, and around all fixture trim plates and escutcheons.
Seal the Tile & Grout
Estimated time: 1–2 hours. Your final layer of long-term protection — don't skip it.
If you used cement grout (not epoxy), seal it before the shower's first use and repeat annually. Cement grout is porous and will absorb water, soap residue, and organic matter without a sealer — leading to staining and eventually mold growth within the grout lines. A penetrating grout sealer applied carefully to the joints (with excess wiped off the tile face before drying) provides this critical protection.
For all natural stone tile — marble, travertine, slate, quartzite, and pebble tile — apply a penetrating impregnating stone sealer to both the stone surfaces and the grout joints before the shower's first use. Natural stone is porous and genuinely requires sealing in a wet shower environment. The water bead test confirms sealer status: drop water on the surface — if it beads and rolls off, the sealer is intact. If the water absorbs and darkens the stone, it's time to reseal.
Allow all sealers to cure per the manufacturer's instructions (typically 24 hours) before using the shower. After 72 hours of grout cure time and 24 hours of sealer cure, your shower is finally ready for its first use.
8 Mistakes Beginners Make (And How to Avoid Every One)
These are the most common errors in first-time shower tiling projects — each one preventable with foreknowledge.
Skipping or Rushing Waterproofing
The leading cause of shower failure. Apply two full coats of waterproofing membrane, pay double attention to corners and seams, and allow each coat to fully cure. This step is the difference between a shower that lasts 30 years and one that causes $10,000+ in structural damage within 5.
Installing Tile on Drywall
Standard drywall and greenboard moisture-resistant drywall are both inappropriate for shower walls. Cement backer board or a foam board system designed for wet areas is the correct substrate — full stop.
Not Planning the Layout Before Setting Tile
Starting to set tile without a dry-layout run leads to ugly sliver cuts at the most visible spots. Spend one hour planning before mixing any thinset — it's the cheapest investment you can make in this project.
Using Gray Thinset Under Light-Colored Tile
Gray thinset telegraphs through light-colored and translucent tiles, creating dark shadows visible through the tile face. Always use white polymer-modified thinset under white, cream, beige, and all natural stone tile.
Grouting Inside Corners Instead of Caulking
All inside corners must be filled with 100% silicone caulk — not grout. Grouted corners crack within months as the structure moves with temperature. Cracked grout in a corner is a direct water infiltration path into the wall.
Not Checking Level and Plumb Constantly
Existing walls and floors are almost never perfectly flat or level. Small errors compound quickly — if you don't check every 3–4 tiles, rows drift visibly out of level long before you reach the ceiling or the adjacent wall.
Adding Water to Stiffening Grout
When grout starts firming in the bucket, instinct says add water. Don't. Water added after the initial mix weakens grout and causes color inconsistency across the installation. Mix smaller batches instead of trying to revive a stiffening one.
Using the Shower Before Full Cure
Thinset needs 24 hours before grouting. Grout needs 72 hours before regular use. Silicone caulk needs 48 hours. Rushing any cure time compromises the installation in ways that aren't immediately visible but show up later as cracked grout, failed adhesion, and water infiltration. The shower will still be there in three days.
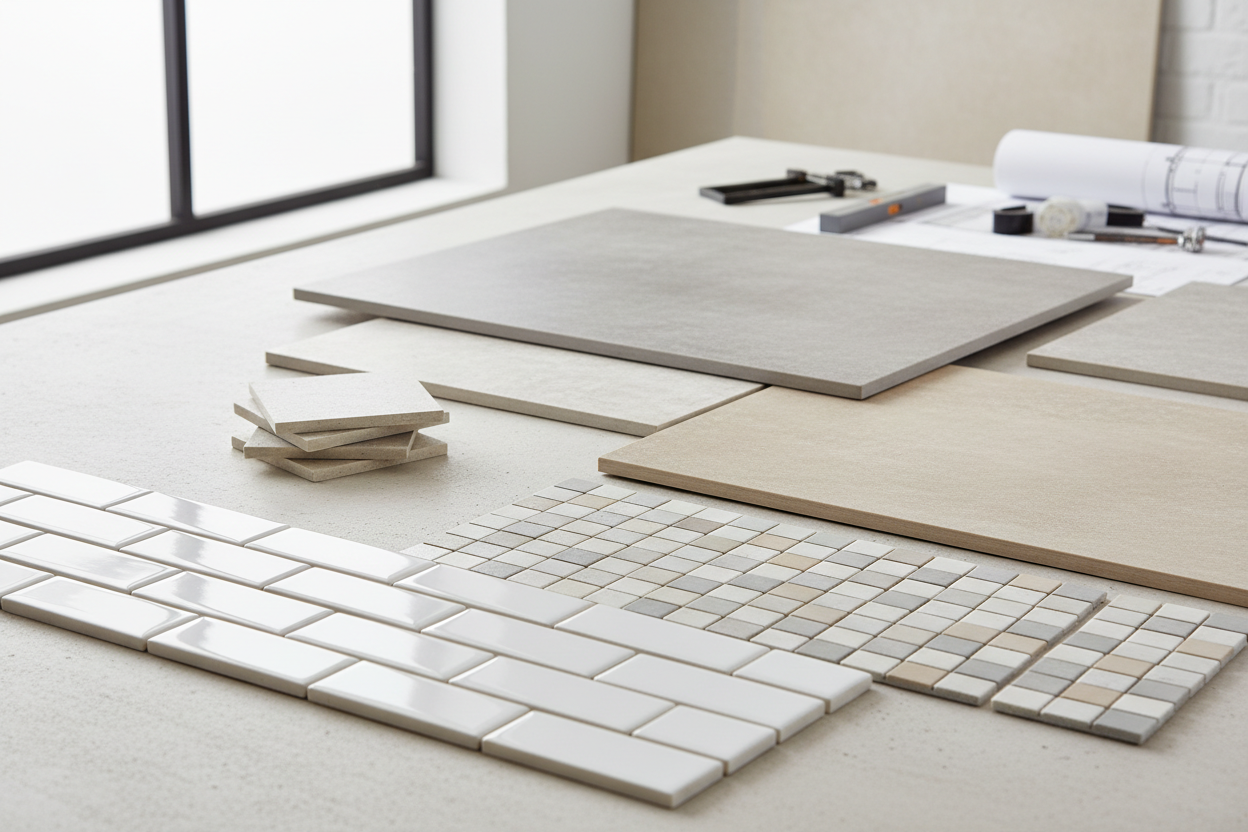
Choosing the Right Tile for Your Shower
Not all tile is appropriate for shower use — and for shower floors specifically, slip resistance is a technical requirement, not just a preference. Here's a complete breakdown.
Best Tiles for Shower Walls
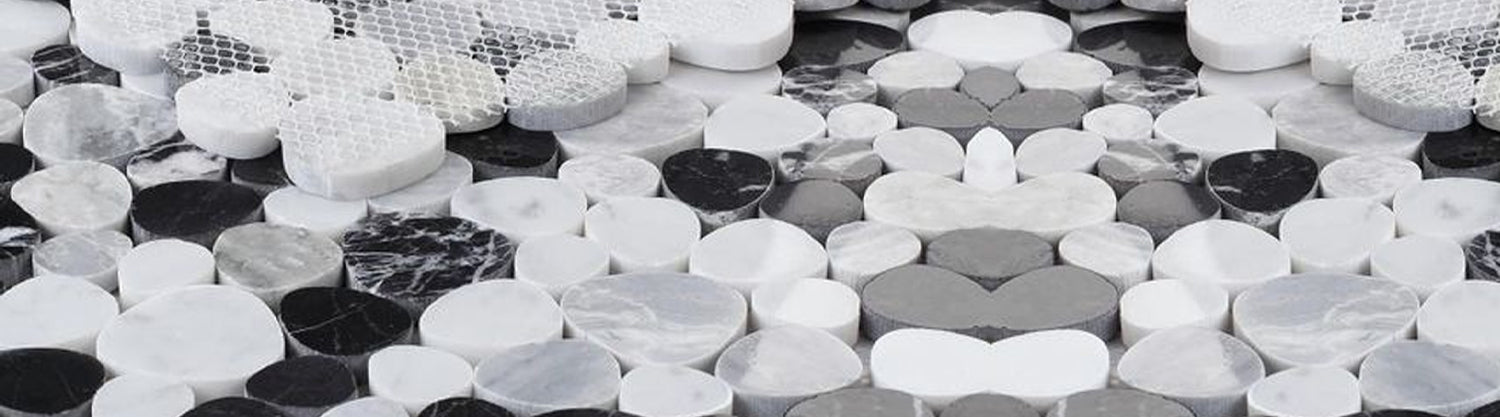
For walls, you have design flexibility because slip resistance isn't the governing factor. Porcelain tile is the industry standard — water absorption below 0.5% makes it essentially impervious to moisture. Glazed ceramic works well on walls at a more accessible price point. Glass tile creates beautiful, luminous shower walls but requires meticulous adhesive application since any imperfections show through the translucent glass. Natural stone — marble, travertine, slate — creates the most luxurious shower walls available but requires annual sealing and stone-safe cleaning products.
Best Tiles for Shower Floors
On shower floors, slip resistance is the primary technical requirement. The ANSI A137.1 standard requires a Dynamic Coefficient of Friction (DCOF) of 0.42 or higher for wet-area floor tile — always confirm this rating before purchasing. Small-format tiles (mosaic, pebble, penny round) provide inherent slip resistance through their high density of grout joints, which act as grip channels underfoot. Large-format smooth porcelain on shower floors is dangerous when wet unless it has a textured or matte surface specifically rated for wet use.
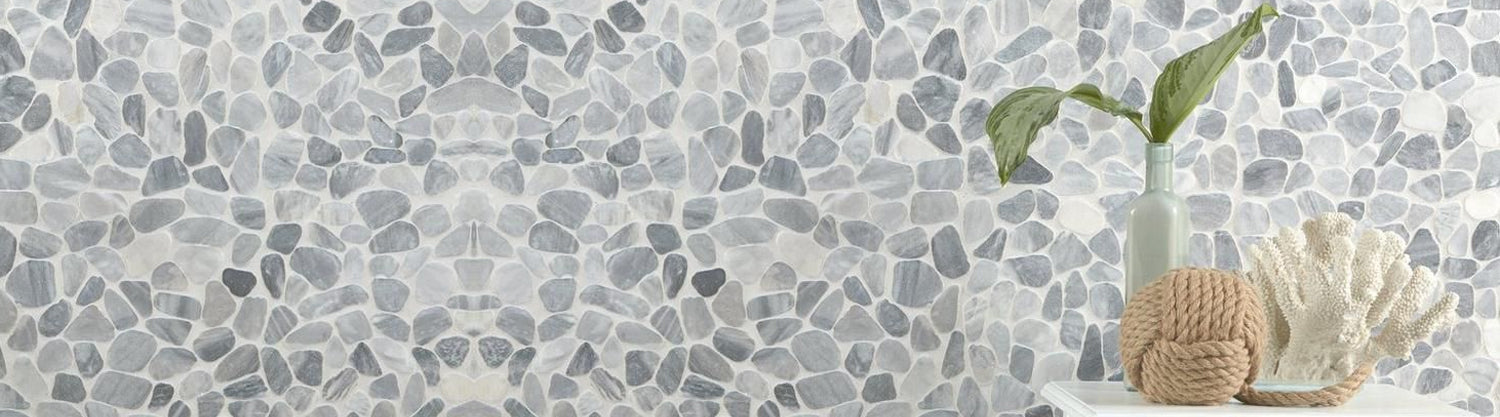
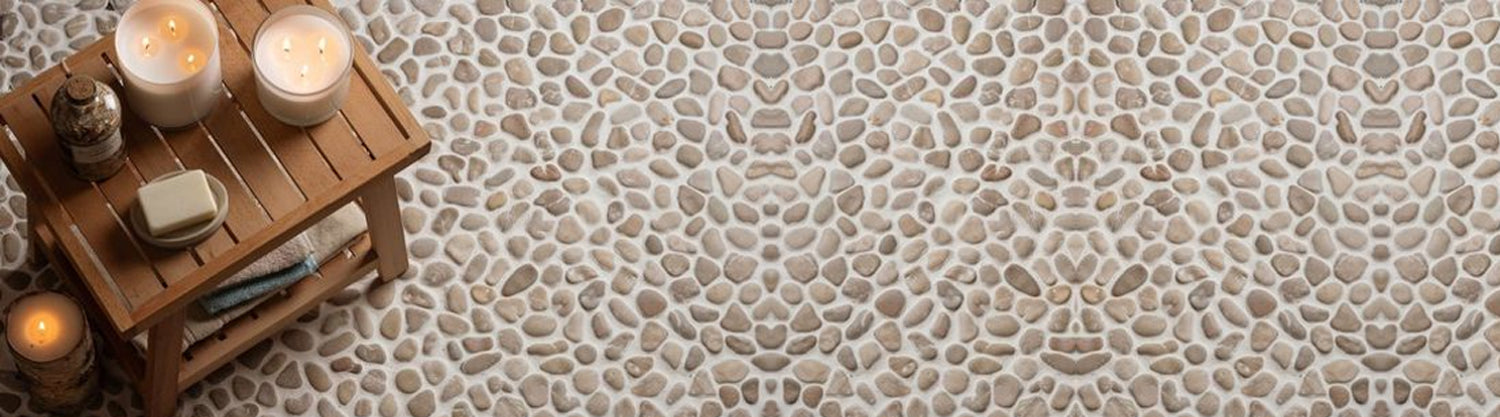
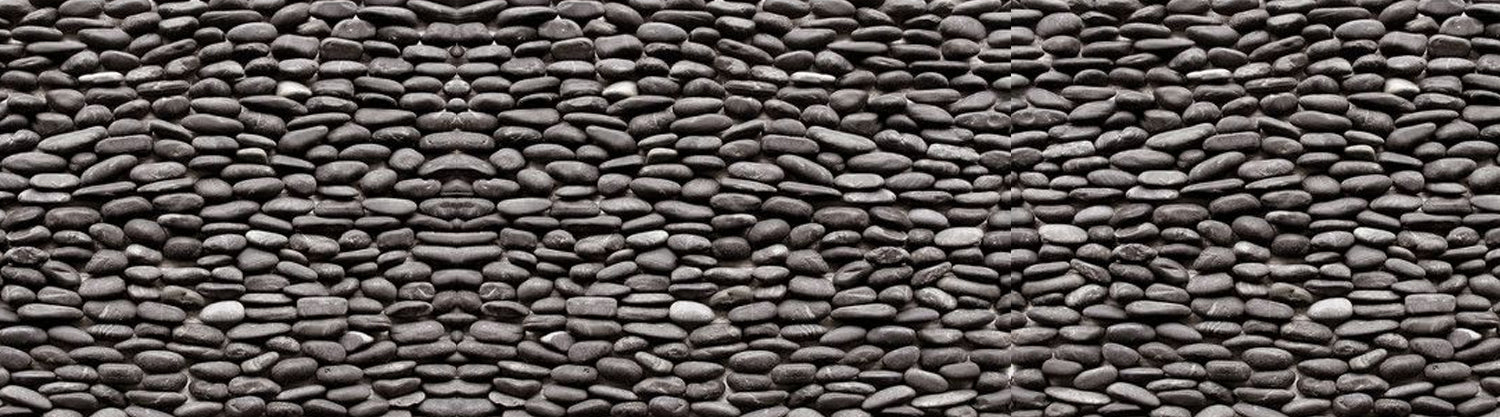
Natural Pebble Tile — A Special Category
Natural pebble tile — flat-sliced or tumbled river stones mounted on mesh backing — has become one of the most sought-after shower floor materials in American residential design. The naturally varied surface provides excellent grip, the organic character of real stone means every installation is uniquely beautiful, and the barefoot experience is genuinely unlike anything a manufactured tile can replicate. It requires annual sealing and careful grouting with a flexible, penetrating grout, but for homeowners who want a shower that feels like a private spa, it's worth every extra step in maintenance.
| Tile Type | Wall Use | Floor Use | Material Cost (sq ft) | Maintenance |
|---|---|---|---|---|
| Glazed Ceramic | Excellent | Matte/textured only | $1–$8 | Low |
| Porcelain | Excellent | Excellent | $3–$20 | Low |
| Glass Tile | Excellent | Not recommended | $7–$30 | Low |
| Marble | Excellent | Honed/textured only | $10–$40 | High — annual seal |
| Pebble / River Stone | Excellent | Excellent | $12–$30 | Medium — annual seal |
| Travertine | Excellent | Honed only | $8–$25 | High — annual seal |
| Mosaic (Ceramic/Stone) | Excellent | Best slip resistance | $8–$30 | Medium |
Frequently Asked Questions
How long does it take to tile a shower yourself?
For a first-time DIYer on a standard 36"×36" shower stall, plan for 3–5 full working days, not including mandatory cure times you cannot skip. Professional installers complete the same project in 6–8 hours, but even they cannot rush the 24-hour thinset cure, 72-hour grout cure, and 48-hour silicone cure. Most projects span a full week from start to first shower use when accounting for all cure times.
Do I need to waterproof shower walls before tiling?
Yes, absolutely — and this is the most important step in the entire project. Tile and grout are water-resistant, not waterproof. Water penetrates grout joints over time, and without a membrane behind the tile, it reaches the wall framing and causes mold, rot, and structural damage. A proper waterproofing membrane (liquid-applied or sheet) applied to the cement backer board is non-negotiable. Professional mold remediation runs $1,100–$3,300; proper waterproofing costs $450–$750. The comparison is not difficult.
Can I tile over existing shower tile?
Technically yes, but it's generally not recommended. Adding tile over existing tile increases wall thickness significantly, creating problems at fixture transitions and door jambs. More critically, you can't inspect the substrate condition behind the old tile — moisture damage and mold behind existing tile gets sealed in rather than fixed. Most professionals recommend full demolition back to the studs for any shower retile project. The additional time and cost pays for itself in long-term reliability.
What's the best tile for a shower floor for beginners?
For beginners, glazed porcelain mosaic tile (2"×2" squares on mesh backing) is the best starting point. The mesh backing makes installation straightforward, the small format naturally accommodates drain slope without lippage, and porcelain's low water absorption makes it ideal for wet areas. The high grout joint density provides natural slip resistance meeting ANSI DCOF 0.42+. Avoid large-format tiles (12"×12" and above) on shower floors for a first project — they require a perfectly flat substrate and very precise mortar bed work.
Do I need to seal grout in a shower?
Yes — if you used cement grout. Cement grout is porous and absorbs water, soap, and organic material without a sealer, leading to staining and mold. Apply a penetrating grout sealer with a foam applicator before the shower's first use and repeat annually. If you used epoxy grout, no sealing is required — epoxy is inherently non-porous and mold-resistant, which is exactly why it's the preferred choice for shower floors despite being more expensive and harder to work with.
Should I start tiling from the floor or the top?
Always start with the floor, then the walls, working bottom to top. Tiling the floor first establishes the reference plane, and wall tiles' bottom row rests neatly on top of the floor tile, creating a clean visual line and a naturally watertight overlap. Starting from the top would require cutting floor tiles to fit beneath wall tile edges — a significantly harder and less reliable approach.
What's the difference between grout and caulk in a shower?
Grout fills joints between tiles on flat, continuous surfaces. Silicone caulk fills joints at corners and transitions where two different planes meet — wall-to-wall corners, wall-to-floor joints, tile-to-tub transitions. The distinction is critical because the shower structure expands and contracts with temperature: grout is rigid and cracks at movement joints; silicone caulk is flexible and maintains its seal indefinitely. Grouted corners crack and admit water; caulked corners flex and stay watertight.
How much does tiling a shower cost DIY vs. professional?
Per HomeAdvisor's 2026 data, average DIY shower tiling material costs run approximately $1,390. Professional installation of the same shower averages $2,700–$4,990 (materials plus labor) per Angi and Thumbtack 2026 data. That represents a potential saving of $1,300–$3,600. Factor in tool purchases or rentals ($200–$400), your time (3–5 days), and the real risk of waterproofing errors — particularly in waterproofing. The savings are real, but if you're not confident in the waterproofing step, hiring a professional for at least that portion is money well invested.
How long should I wait before using the shower after tiling?
Wait a minimum of 72 hours after grouting before regular shower use. Silicone caulk requires a separate 48 hours of cure. Grout and stone sealers add another 24 hours of cure time after application. In practice, many installers recommend a full week between completing the installation and the shower's first use — especially if any steps ran close to minimum cure windows. The structure will last decades; it can afford a few more days of patience.
Can I use pebble tile on a shower floor?
Absolutely — and for many homeowners, natural pebble tile creates the most beautiful and spa-like shower floor experience available. Natural pebble tile (flat-sliced or tumbled river stones on mesh backing) provides excellent slip resistance and a uniquely organic, handcrafted aesthetic. It requires annual sealing with a penetrating stone sealer and careful grouting with unsanded grout for smaller pebbles. The installation is slightly more involved than standard mosaic tile but entirely achievable for a careful DIYer working methodically through this guide.
You're Ready to Start — Here's One Last Thing
Tiling a shower is genuinely one of the most rewarding home improvement projects you can take on as a homeowner. There's a particular kind of satisfaction in stepping into a shower you built yourself every morning — knowing that every tile, every grout joint, every waterproofed corner was set by your own hands. When it's done right, a tiled shower can last 30–50 years, function flawlessly, and add real, tangible value to your home.
The keys to success, in priority order: don't skip waterproofing, plan your layout before you touch a single tile, use white thinset under light tile, caulk your corners rather than grouting them, and respect every cure time in the process. Those five rules govern the difference between a shower that lasts decades and one that fails within years.
And finally — the tile you choose matters just as much as the technique that installs it. A perfect installation using uninspiring tile produces an uninspiring result. Whether your vision is a sleek modern shower with large-format porcelain, an organic spa experience with natural river pebble tile, a classic statement with herringbone stone mosaic, or a luminous accent wall in Calacatta marble — the tile sets the entire tone of the space.
Find Your Perfect Shower Tile at Tile Hub
At Tile Hub, we carry a carefully selected range of natural stone tiles, pebble mosaics, porcelain, ceramic, and specialty shower tile — from classic subway to handcrafted river pebble, premium marble mosaic, and everything in between. We offer sample ordering so you can hold the actual tile in your bathroom, under your actual lighting, before committing to a full project order. Browse our complete shower tile collection and find the tile that makes your installation genuinely memorable.
Shop Shower Tile at Tile Hub