The grout you choose for your shower determines how long the installation lasts, how much cleaning it demands, how well it resists mold, and whether it still looks good in year five. This guide covers every grout type for shower tiles — with honest comparisons, professional recommendations, and the specific situations each grout suits best.
Best overall for shower floors: Epoxy grout — non-porous, waterproof, never needs sealing, genuinely mold-resistant. The professional gold standard for wet areas per MAPEI, Laticrete, and Floor & Decor.
Best for shower walls (narrow joints under 1/8"): Unsanded cement grout or polymer-modified unsanded — smoother texture, better adhesion on vertical surfaces, won't scratch glass or polished stone.
Best for shower walls (joints 1/8" and wider): Sanded or high-performance polymer-modified cement grout.
The governing rule: Joint width under 1/8" = unsanded. Over 1/8" = sanded. Whenever the budget allows in a shower = epoxy.
Grout is the most underestimated component of any shower installation. Homeowners spend days choosing the perfect tile, then pick grout in two minutes at checkout. The consequences show up months or years later — in staining that won't clean out, in black mold lines that return no matter how hard you scrub, in grout that cracks and lets water behind the wall.
In a shower, grout faces constant pressure: daily moisture, soap and body oil, temperature cycling, and the mechanical stress of regular cleaning. Standard Portland cement grout is porous by nature and absorbs all of it. The difference between a shower that looks clean and fresh after five years and one that demands constant maintenance often comes down to one decision made before the tile went in: which grout type was used, and whether it was correctly sealed.
For the full shower installation context — waterproofing, substrate, thinset, and grout sequence — our how to tile a shower step-by-step guide is the comprehensive companion resource. For tile selection that informs your grout choice, our best tile for shower walls guide covers every material option.
📊 Industry Consensus (2026): MAPEI's technical team — one of the leading professional grout manufacturers in the US — states directly: "Epoxy grouts are the best option for a shower — they are the most water- and stain-resistant of all grouts." Floor & Decor's 2026 Grout Buying Guide agrees, recommending epoxy or single-component grout as the top choice for wet areas. Despite this professional consensus, the majority of residential shower installations still use standard cement grout because of lower cost and easier application — a trade-off this guide helps homeowners evaluate honestly.
- The 4 Grout Types Explained
- Epoxy Grout: The Gold Standard
- Sanded Cement Grout
- Unsanded Cement Grout
- Polymer-Modified Grout
- Head-to-Head Comparison Table
- The Joint Width Rule
- Best Grout by Tile Type
- Grout Color for Showers
- When and How to Seal
- 6 Grout Mistakes That Ruin Showers
- Frequently Asked Questions
The 4 Main Grout Types for Shower Tiles
Before comparing performance, it's worth understanding what each grout type actually is at a material level — because the composition differences explain everything about how they perform in a wet environment.
Cement-based grout (sanded and unsanded) is the traditional standard. Its primary ingredient is Portland cement, which hardens through a reaction with water. Even well-installed cement grout retains inherent porosity — which is why sealing is always necessary in wet areas. Available in hundreds of colors and widely compatible with all tile types, cement grout is the most accessible option and the most frequently problematic in shower applications over the long term.
Epoxy grout is structurally different. Made from epoxy resins and a filler powder rather than cement, it cures through a chemical reaction — not water evaporation — producing an extremely dense, non-porous joint. It doesn't shrink, doesn't crack, doesn't absorb moisture, doesn't harbor mold, and never needs sealing. The trade-off is cost (3–5× more than cement grout) and a more demanding installation process.
High-performance polymer-modified cement grout is cement-based but enhanced with latex or acrylic polymers that reduce porosity, improve flexibility, and extend color life. Brands like Laticrete Prism, MAPEI Ultracolor Plus FA, and Custom Building Products Polyblend Plus fall in this category. They outperform standard cement grout in wet areas but don't match epoxy's non-porous characteristics.
Urethane / premixed grout is a pre-mixed, water-based product offering stain resistance similar to epoxy with easier installation — a middle ground option. It has limitations in fully submerged environments (not suitable for pools or steam rooms) but performs well in standard residential showers.
Epoxy Grout: The Shower Gold Standard
Epoxy Grout
Best for Shower Floors · Non-Porous · Never Needs SealingEpoxy grout is a two-component system — epoxy resins mixed with a hardener and colored filler aggregate. When the components combine, a chemical reaction cures the grout into an extremely dense, non-porous joint. Unlike cement grout, which dries through water evaporation and retains inherent porosity, epoxy cures through chemistry and produces a joint that is genuinely impervious to water, stains, and organic growth.
In a shower, this translates to grout joints that resist mold and mildew (no porous surface for organic matter to colonize), that don't absorb soap scum or body oils, that can be cleaned with a simple wipe rather than a grout brush, and that hold their color without fading or discoloring over years of daily use. One real-world documented installation using epoxy grout lasted 42 years in a tub and shower with no cracking and no mildew — only minor color fading. No cement grout achieves that lifespan in a wet environment.
Epoxy grout absorbs approximately 50 times less water than traditional cement grout and is twice as strong mechanically. It is compatible with ceramic, porcelain, glass, and natural stone tile — though porous natural stone must be sealed before epoxy grouting to prevent staining of the tile body itself.
✔ Advantages
- Non-porous — genuinely waterproof joints
- Never needs sealing
- Outstanding mold and mildew resistance
- Absorbs 50× less water than cement grout
- Twice the mechanical strength of cement grout
- Excellent stain resistance
- Color stays consistent — doesn't fade or grey
- Works in all joint widths from 1/16" to 1/2"
- Ideal for glass tile and natural stone mosaics
- Long-term cost efficiency despite higher upfront price
✖ Considerations
- 3–5× more expensive than standard cement grout
- Shorter working time — sets faster than cement
- Requires efficient, precise application technique
- Epoxy haze must be cleaned promptly from tile surface
- Cannot accept sealer (unnecessary, but worth knowing)
- Can appear slightly glossy compared to cement texture
- Narrower color range than cement grout
- Professional installation strongly recommended
- Most formulas not suitable for steam showers
- Porous tiles must be sealed before epoxy grouting
When Epoxy Grout Is the Professional Standard
Three specific shower scenarios make epoxy grout essentially non-negotiable among professional tile installers:
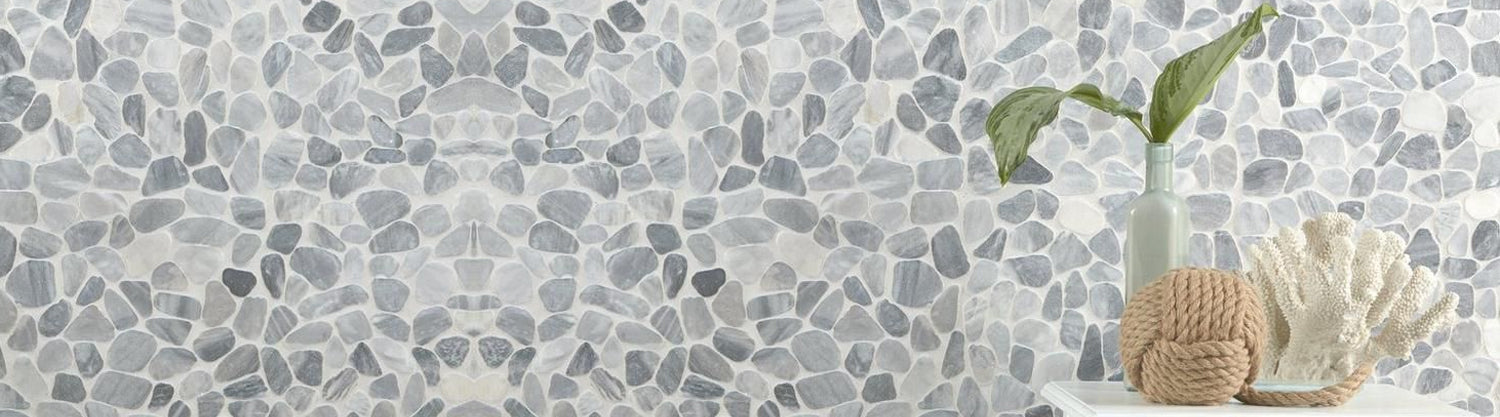
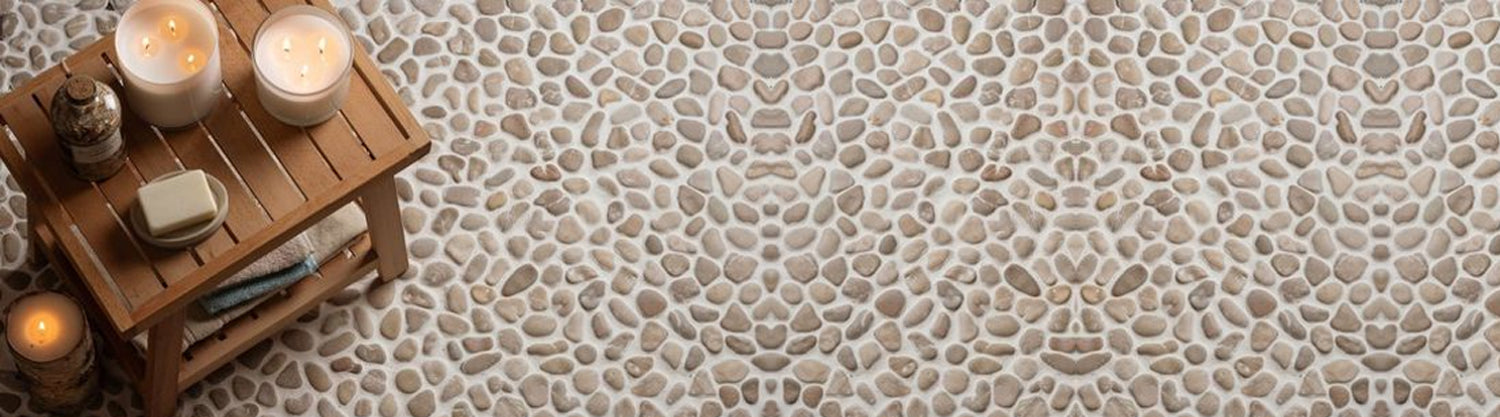
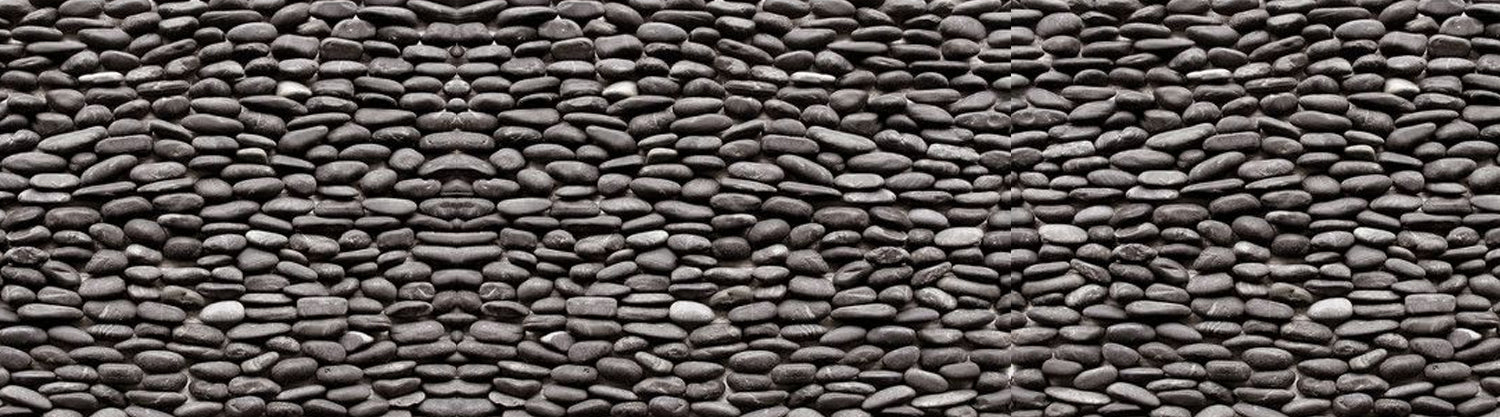
- Shower floors. Floors are the highest-moisture, highest-wear surface in any shower. They accumulate standing water, soap residue, and organic matter in grout joints constantly. Epoxy grout on shower floors eliminates the mold growth, staining, and repeat sealing that standard cement grout requires. For pebble tile shower floors specifically, epoxy handles the irregular joint widths and protects the many exposed grout joints from the staining that plagues cement grout on pebble installations.
- Light-colored grout. White, cream, and light grey cement grout in showers visibly discolors within 1–3 years even with diligent sealing. Epoxy grout in the same colors holds its shade because the pigment is bound within the non-porous matrix rather than absorbing staining agents.
- Glass tile. Glass tile requires non-sanded or fine-filler epoxy to avoid surface scratching. Epoxy is the professional preference for glass tile because its smooth texture suits the glass aesthetic and its non-porosity prevents staining through translucent tile. More on glass tile selection in our glass tile for showers guide.
Applying Epoxy Grout: Key Differences from Cement
Epoxy grout is more demanding to apply than cement grout — understanding the specific technique requirements before starting prevents the most common problems:
- Work in small sections of 2–3 square feet at a time because epoxy sets in 20–30 minutes (versus 45–60 for cement)
- Mix only what you can place in that window — do not attempt to extend a setting batch
- Apply with a rubber grout float at 45 degrees, packing joints firmly
- Clean excess from tile surface immediately with warm water and a damp sponge — do not allow haze to dry
- Clean in two passes: immediately after application, then again 20–30 minutes later
- Use an epoxy-specific grout sponge, which removes residue more effectively than a standard tile sponge
⚠ Seal Porous Tiles Before Epoxy Grouting: Marble, travertine, pebble tile, unglazed ceramic, and all natural stone are porous and will absorb epoxy grout just as they absorb any liquid. Before epoxy grouting any porous tile surface, apply a penetrating stone sealer to all tile faces first. This creates a barrier that prevents epoxy from staining the tile body while still allowing it to bond correctly to the grout joints. Our tile sealer guide covers which sealers are appropriate for each stone type.
Sanded Cement Grout
Sanded Cement Grout
Joints 1/8" and Wider · Floors · Most AffordableSanded grout is Portland cement mixed with fine silica sand and pigment. The sand aggregate does three things: it prevents significant shrinkage during curing (allowing it to fill wider joints without cracking), adds compressive strength for physical wear resistance on floors, and gives the grout enough body to fill joints without slumping. The governing rule is simple: use sanded grout for joints 1/8 inch or wider.
In shower applications, sanded grout performs adequately on floor tile with joints 1/8"+ when properly sealed, and will never match epoxy's moisture resistance or mold-resistance. The sand particles are abrasive enough to scratch polished natural stone (marble, honed travertine, quartzite) and glass tile surfaces during grouting — for these materials, unsanded or fine-filler epoxy is always correct.
An important upgrade: polymer-modified sanded grout (MAPEI Keracolor S, Laticrete Prism, Custom Building Products Polyblend Plus) adds latex or acrylic to the base formula. These additives reduce porosity, improve flexibility, and extend color life significantly compared to standard sanded cement grout. For shower floors where full epoxy isn't feasible, polymer-modified sanded grout is a meaningful upgrade worth the modest premium. Our sanded vs unsanded grout guide covers the full comparison in detail.
✔ Advantages
- Most affordable grout type
- Widest color range available
- DIY-friendly — easy to mix and apply
- Long working time — forgiving for first-time installers
- Good for joints 1/8"–5/8" wide
- Minimal shrinkage in wider joints
- Strong compressive strength for floor use
✖ Considerations
- Porous — must be sealed in wet areas
- Requires annual resealing in showers
- Absorbs moisture, soap scum, and staining agents
- Can harbor mold in grout lines without maintenance
- Sand particles scratch polished stone and glass tile
- Color can fade or grey over time
- Not suitable for joints under 1/8"
Unsanded Cement Grout
Unsanded Cement Grout
Joints Under 1/8" · Shower Walls · Glass & Polished StoneUnsanded grout contains very fine mineral particles rather than silica sand aggregate. The absence of sand creates two important properties: a smooth, dense texture that compacts correctly into narrow joints under 1/8" (where sanded grout's particles would prevent proper filling), and better adhesion to vertical surfaces because its tackier consistency resists slumping under gravity while curing.
On shower walls specifically, unsanded grout is the standard recommendation for two reasons. First, most shower wall tile — 3×6 subway, 4×12 plank, mosaic sheets — is installed with 1/16"–1/8" joints, within unsanded grout's working range. Second, the vertical surface means grout must stay in place while setting — unsanded grout's stickier consistency suits this better than sanded grout, which can slump in narrow vertical joints before it cures.
For glass tile and polished natural stone, unsanded grout is essential — the sand particles in sanded grout will permanently scratch these surfaces during grouting. The scratches are not removable without professional refinishing. For shower walls in these materials: unsanded or fine-filler epoxy only.
✔ Advantages
- Correct choice for joints under 1/8"
- Better adhesion on vertical surfaces
- Will not scratch glass or polished stone tile
- Smooth fine texture suits delicate applications
- Easier to work into narrow joints
- Affordable and widely available
✖ Considerations
- Porous — must be sealed in wet areas
- Shrinks in joints wider than 1/8"
- Not appropriate for floor joints wider than 1/8"
- Requires annual sealing in shower environments
- Standard porosity means mold risk without maintenance
High-Performance Polymer-Modified Grout
This category occupies the practical middle ground between standard cement grout and full epoxy installation, and it's often the smartest choice for shower walls where the budget or installer experience doesn't support full epoxy application.
High-performance polymer-modified grouts (Laticrete Prism, MAPEI Ultracolor Plus FA, Custom Building Products Polyblend Plus, MAPEI Keracolor) add latex or acrylic polymers to the cement base, producing meaningful improvements:
- Reduced porosity — meaningfully less water absorption and staining than standard cement
- Better flexibility — less cracking under thermal movement and minor substrate deflection
- Improved color retention — pigments are more stable because the polymer matrix reduces color-washing during cleaning
- Some universal formulas work across sanded and unsanded joint widths — MAPEI Ultracolor Plus FA works for joints 1/16"–3/4" without switching between products
- Some include antimicrobial additives — Custom Building Products Prism SCG contains Microban® technology that inhibits mold growth on the grout surface
✔ The Smart Budget Approach: If full epoxy installation is outside your budget or comfort zone, use high-performance polymer-modified grout on shower walls and epoxy specifically on the shower floor. The floor is where grout performance matters most — it accumulates the greatest moisture, organic matter, and physical wear. It also covers the smallest area. Using epoxy where it matters most and polymer-modified grout where it's adequate is an effective use of your grout budget, covering the shower floor with the strongest product while managing overall project cost.
Head-to-Head Comparison: All Grout Types for Showers
| Property | Epoxy Grout | Sanded Cement | Unsanded Cement | Polymer-Modified |
|---|---|---|---|---|
| Water Resistance | Excellent — non-porous | Poor — porous | Poor — porous | Good — reduced porosity |
| Mold Resistance | Excellent | Poor | Poor | Good–Excellent (with additives) |
| Stain Resistance | Excellent | Poor | Poor | Good |
| Requires Sealing? | No — ever | Yes — annually | Yes — annually | Yes — every 2–3 years |
| Joint Width Range | 1/16"–1/2" | 1/8"–5/8" | 1/16"–1/8" | Varies by formula |
| Durability | Excellent — 20–50 yrs | Moderate — 5–15 yrs | Moderate — 5–15 yrs | Good — 10–20 yrs |
| Scratches Glass/Polished Stone? | No (fine-filler formula) | Yes — avoid on delicate surfaces | No | Depends on formula |
| Color Consistency | Excellent — doesn't fade | Moderate — fades over time | Moderate — fades over time | Good — better than standard |
| Installation Difficulty | High — pro recommended | Low — DIY friendly | Low — DIY friendly | Low–Moderate |
| Material Cost | $$$$ (3–5× cement) | $ (budget) | $ (budget) | $$ (moderate premium) |
| Shower Floors | ✅ Best choice | Acceptable (wide joints, sealed) | Not recommended | Good alternative to epoxy |
| Shower Walls | ✅ Premium choice | Good (wide joints) | ✅ Standard narrow joint choice | ✅ Excellent choice |
The Joint Width Rule: Which Grout for Which Gap
Joint width is the governing technical factor in grout selection. Get it wrong and the grout fails regardless of quality — sanded grout in a narrow joint won't compact and will crack; unsanded grout in a wide joint shrinks away from tile edges and leaves voids.
| Joint Width | Correct Grout Type | Typical Shower Application |
|---|---|---|
| Under 1/16" (1.5mm) | Unsanded or consult manufacturer | Rectified large-format porcelain, very thin joints |
| 1/16"–1/8" (1.5–3mm) | Unsanded cement or epoxy | Subway tile, wall mosaic sheets, standard wall tile |
| 1/8"–3/16" (3–5mm) | Sanded, polymer-modified, or epoxy | Floor tile, larger wall formats |
| 3/16"–1/2" (5–12mm) | Sanded or epoxy | Natural stone, pebble tile, floor mosaic |
| Over 1/2" (12mm+) | Sanded or specialty | Irregular stone, outdoor pavers |
✔ The Tile Spacer Connection: Your grout joint width is determined by the tile spacers used during installation. Standard spacers are 1/16", 1/8", 3/16", and 1/4". Select your grout type based on your intended spacer width — and decide on spacer width before ordering grout, because changing joint width mid-project means switching grout types. Our shower tiling guide covers spacer selection for each tile format and size.
Best Grout by Shower Tile Type
Porcelain and Ceramic Tile
The most forgiving tile type for grout selection. Both sanded and unsanded cement grouts work on porcelain and ceramic, with joint width determining the choice. For shower floors in porcelain, epoxy is the professional recommendation. For shower walls in standard ceramic subway tile, polymer-modified unsanded grout offers an excellent combination of performance and workability. Browse our porcelain tile collection and subway mosaic tile collection for complete installation guidance.
Natural Stone (Marble, Travertine, Slate)
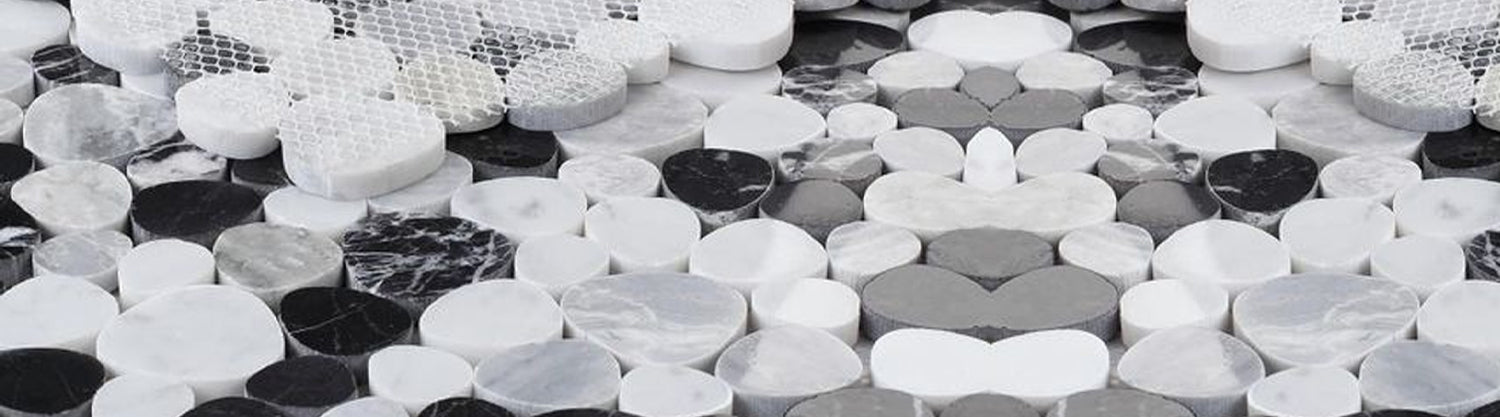
Natural stone requires the most careful grout selection. Marble and travertine are polished — sanded grout will scratch their surfaces during application. The correct options are unsanded cement grout (narrow joints), epoxy (any joint width), or fine-filler polymer-modified grout. For all natural stone, seal the tile with a penetrating stone sealer before grouting to prevent grout staining the stone body. Our natural stone bathroom tiles guide covers the full maintenance approach. For stone mosaic tile options, browse our stone mosaic tile collection.
Glass Tile
Glass tile requires unsanded or fine-filler epoxy grout — never standard sanded grout, which permanently scratches glass surfaces during application. Epoxy is the professional preference for glass tile: its smooth texture complements glass, its non-porosity prevents staining through translucent tile, and its color consistency maintains the installation's appearance long term. More detail in our glass tile for showers guide. Browse our glass tile collection for shower wall options.
Pebble Tile and Stone Mosaic
Pebble tile has irregular surface and relatively wide, variable joints — requiring a flexible, durable grout that accommodates uneven spacing. Sanded grout or epoxy are both used in pebble tile applications, with epoxy preferred for maximum performance and color consistency. The natural stone surface must be sealed before grouting regardless of grout type. Our pebble tile shower floors guide covers the full installation sequence. For pattern mosaics like herringbone, our herringbone stone mosaic collection includes joint width specifications per product.
Large-Format Tile (12×24 and Above)
Large-format rectified tiles are typically installed with 1/16"–1/8" joints, making unsanded or polymer-modified grout the correct choice. The near-invisible grout lines in large-format installations look best with grout color closely matched to the tile face — contrasting grout in a very narrow joint draws attention rather than receding. Our walk-in shower tile guide covers large-format design in full detail.
Grout Color for Showers: What Actually Works Over Time
Light Grout (White, Cream, Light Grey)
Light cement grout in shower applications is the highest-maintenance choice. Standard Portland cement white or cream grout absorbs soap scum, body oils, and mineral deposits and visibly discolors within months of installation even with sealing. If you want light grout in a shower, epoxy grout is essentially required — its non-porous matrix keeps color stable indefinitely. One professional tile installation guide notes: "Medium grey is the safest color choice for regular grout because many installations grey out over time as soap and water take their toll." That reality makes light cement grout a commitment to ongoing maintenance rather than a set-and-forget choice.
Medium Grout (Grey, Taupe, Warm Beige)
Medium tones — particularly medium grey — are the most practical choice for shower grout in cement-based applications. These tones conceal the discoloration from soap scum and water minerals far better than light colors, while still allowing tile to be the dominant visual element. Industry professionals consistently recommend medium grey as the safest cement grout color for long-term shower satisfaction. When using our Calacatta marble mosaic tiles, a warm taupe or light grey grout creates a harmonious, luxury hotel quality look.
Dark Grout (Charcoal, Black, Deep Brown)
Dark grout creates bold visual impact — dark grout on white subway tile is one of the most striking shower combinations in current US bathroom design. Practically, dark grout hides organic staining better than any other tone. The reverse problem: mineral deposits and limescale from hard water show as white or grey streaks against dark grout. In hard water areas, dark grout requires more frequent cleaning to remove limescale buildup. Epoxy in dark colors is particularly effective because the non-porous matrix means only surface deposits (which wipe off easily) rather than absorbed staining.
Matching vs Contrasting
The professional rule: matching grout to tile is more forgiving of installation variability; contrasting grout highlights every imperfection. With matching grout, minor variations in joint width and tile alignment are less visible. With contrasting grout, every inconsistency in the installation is amplified. If your installation is precise — consistent joint widths, perfectly level rows — contrasting grout creates stunning visual impact. If there's any variability, matching grout is the safer aesthetic choice regardless of grout type.
When and How to Seal Shower Grout
For cement-based grout in any shower application, sealing is not optional — it's the critical step that determines performance for the first years before resealing. Epoxy grout never needs sealing and cannot accept it due to its non-porous structure.
When to Seal
Seal cement grout after full curing — typically 48–72 hours after grouting, when the grout feels completely hard and dry with no softness in any joint. Applying sealer to insufficiently cured grout traps moisture inside and can cause cracking or discoloration. Always seal before the shower's first use so the grout is protected from its very first exposure to water, soap, and body oils.
How to Seal Correctly
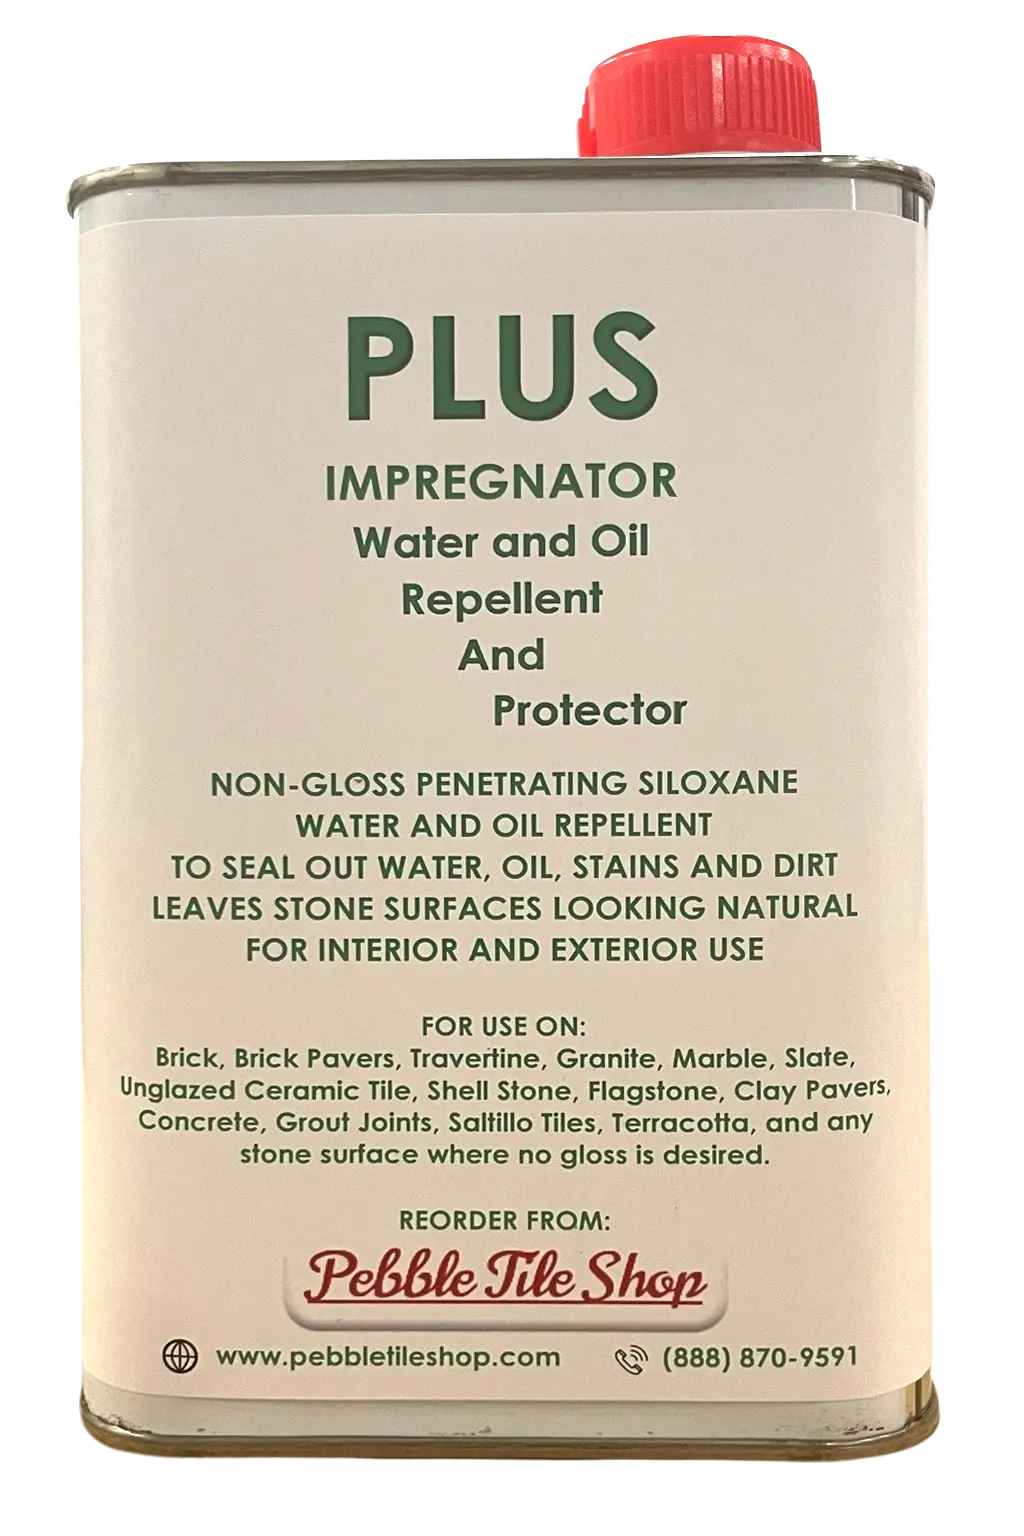
- Use a penetrating (impregnating) sealer — not a surface sealer. Penetrating sealers absorb into the grout and fill the porous structure from within. Surface sealers form a film that wears away quickly in wet areas and can peel or yellow.
- Apply with a small foam applicator or grout brush, working directly into joints
- Wipe excess sealer off tile face immediately before it dries — dried sealer on tile leaves a hazy residue
- Allow sealer to cure 24 hours before shower use
- Re-seal annually — or when the water bead test shows absorption
The water bead test is your ongoing maintenance indicator: drop water on the grout. If it beads and rolls off, the sealer is intact. If it absorbs and darkens the grout, re-sealing is needed. For natural stone tile alongside cement grout, apply a penetrating stone impregnating sealer to both the stone and the grout. Our complete tile sealers guide covers every product type and application method.
⚠ Sealing Is Not Waterproofing: This is one of the most common and costly shower maintenance misconceptions. Grout sealer reduces water absorption through the grout joint — it does not make the shower waterproof. The waterproofing that matters is the membrane installed behind the tile. A properly waterproofed shower and correctly sealed grout are both necessary. Relying on grout sealer to compensate for inadequate substrate waterproofing will cause water damage regardless of which grout type is used. Our shower installation guide covers the correct substrate waterproofing sequence in full.
6 Grout Mistakes That Ruin Shower Installations
Using Sanded Grout on Glass or Polished Stone
The sand particles in sanded grout are abrasive enough to permanently scratch glass tile and polished natural stone during grouting. These scratches cannot be removed without professional refinishing. For glass tile, polished marble, honed travertine, and any delicate surface: unsanded or fine-filler epoxy only — without exception.
Grouting Inside Corners Instead of Caulking
Every inside corner in a shower — where walls meet and where walls meet the floor — must be caulked with 100% silicone, not grouted. Grout is rigid and cracks at corners under thermal movement. Cracked corner grout is a direct water infiltration path. Silicone caulk flexes with movement and maintains the watertight seal indefinitely. This applies regardless of which grout type is used on the flat surfaces. For complete corner sealing guidance, our shower tiling guide covers the caulk-vs-grout rule in detail.
Using the Wrong Grout for the Joint Width
Sanded grout in joints under 1/8" won't compact correctly and will crack. Unsanded grout in joints over 1/8" will shrink, crack, and pull away from tile edges. Joint width governs grout type — always confirm your spacer width and match the grout type to it before ordering any grout materials.
Adding Water to Stiffening Cement Grout
When cement grout starts firming in the bucket during a long application session, instinct says to add water. This weakens the final grout significantly — the water-to-cement ratio has already been set and adding more disrupts the chemistry, resulting in weaker, more porous joints that fail sooner in a wet environment. Mix smaller batches instead.
Not Sealing Porous Tiles Before Epoxy Grouting
Porous natural stone — marble, travertine, pebble tile, unglazed ceramic — will absorb epoxy grout into the tile body during application if the tile hasn't been pre-sealed. The resulting staining is permanent and essentially impossible to remove. Always apply a penetrating stone sealer to all porous tile faces and allow it to cure fully before applying any epoxy grout.
Letting Epoxy Haze Dry on the Tile Surface
Epoxy grout haze left to dry on the tile face hardens into a difficult-to-remove glossy film. Unlike cement grout haze, which can be buffed off after 24 hours, hardened epoxy haze requires commercial epoxy haze remover or mechanical abrasion. Always clean in two passes — immediately after application, then again 20–30 minutes later — using clean water each time.
Frequently Asked Questions
What is the best grout for a shower?
Epoxy grout is the professional consensus best choice for shower applications, endorsed by MAPEI, Laticrete, Floor & Decor, and the Tile Council of North America for wet areas. It's non-porous, genuinely waterproof, never needs sealing, resists mold and staining, and holds its color indefinitely. For shower floors specifically, epoxy is the clear professional recommendation. On shower walls with narrow joints and standard tile, high-performance polymer-modified unsanded grout (like Laticrete Prism or MAPEI Ultracolor Plus FA) offers excellent performance at lower cost and with easier installation than epoxy.
Do I need to seal epoxy grout in a shower?
No — epoxy grout is inherently non-porous and cannot accept a sealer. Sealing is both unnecessary and ineffective on epoxy. This is one of epoxy's primary advantages over cement grout: once installed correctly, no sealing is ever required. Regular cleaning with a pH-neutral cleaner is all the maintenance epoxy grout needs in a shower. Cement-based grouts (sanded and unsanded) do require sealing in shower applications — annually for standard cement, every 2–3 years for high-performance polymer-modified formulas.
Sanded vs unsanded grout for shower walls — which do I use?
The answer is determined by joint width. For shower wall tile with joints under 1/8" — the most common range for 3×6 subway tile, 4×12 plank tile, and most mosaic formats — use unsanded grout. For shower wall tile with joints 1/8" or wider, use sanded or polymer-modified grout. Unsanded grout also offers better adhesion on vertical surfaces and won't scratch polished or glass tile surfaces. For the complete technical breakdown, our sanded vs unsanded grout guide covers every scenario with clear recommendations.
Is epoxy grout worth the extra cost in a shower?
In shower applications, yes — particularly for floors. The upfront cost premium (3–5× cement grout material cost, plus higher labor if professionally installed) is offset by eliminated sealing costs, eliminated mold remediation, and a significantly longer grout lifespan. A shower floor is a small area — the total additional cost of epoxy over cement grout on a standard 36×36 inch shower floor is often $50–$150 in material. Against a 20–50 year lifespan with no sealing maintenance versus 5–15 years of annual sealing on cement grout, the long-term value proposition for epoxy is clear.
How often does shower grout need to be resealed?
Standard cement-based shower grout should be sealed annually. High-performance polymer-modified cement grout typically extends this to every 2–3 years. The water bead test provides ongoing guidance: drop water on the grout; if it beads and rolls off the sealer is intact, if it absorbs and darkens the grout it needs re-sealing. Epoxy grout never needs sealing. All sealing guidance and product recommendations are covered in our tile and grout sealers guide.
What grout is best for pebble tile shower floors?
Epoxy grout or sanded polymer-modified grout are both used in pebble tile applications. Epoxy is the performance choice — it accommodates the variable joint widths of pebble tile, prevents staining in the many exposed grout joints, and maintains color consistency over time. Sanded polymer-modified cement grout is the budget-friendly alternative that performs adequately when properly sealed. Always seal the natural stone pebble tile surface before grouting (regardless of grout type) to prevent grout staining the stone. Our pebble tile shower floors guide covers the full installation and maintenance sequence. Browse our pebble stone mosaic tile collection for ready-to-install options.
Can I use white grout in a shower?
Yes, but with honest expectations. White cement grout in a shower will discolor — absorbing soap scum, body oils, and water minerals — typically within 6–18 months even with regular sealing. If white or light grout matters to your design, epoxy grout is the practical solution: the non-porous matrix keeps white color stable indefinitely without the discoloration that makes white cement grout such a maintenance commitment. With standard white cement grout and no ongoing sealing discipline, the result over time is visible greying or yellowing that requires professional color restoration to address.
Does epoxy grout prevent mold in a shower?
Epoxy grout dramatically reduces mold risk because mold requires a porous surface to establish colonies — and epoxy is non-porous. As Laticrete's technical team notes, mold can still appear on epoxy grout surfaces in dark, damp conditions if organic material accumulates from soap residue or body oils. Regular cleaning with a pH-neutral cleaner removes this material before mold can establish. Some premium epoxy formulas include built-in antimicrobial technology (Laticrete SPECTRALOCK) for an additional layer of inhibition. Standard cement grout, by contrast, provides a genuinely porous surface that actively harbors mold growth and makes complete removal very difficult short of regrouting.
What grout should I use for glass tile in a shower?
Glass tile requires unsanded grout or fine-aggregate epoxy grout — never standard sanded grout, which permanently scratches glass surfaces during application. Epoxy is the professional preference for glass tile: its smooth consistent texture suits the glass aesthetic, its non-porosity prevents staining visible through translucent tile, and its color consistency maintains the installation's appearance long-term. Use glass-tile-specific epoxy products with fine filler aggregate rather than coarse-aggregate epoxy formulas. Browse our glass tile collection and read our glass tile for showers guide for complete selection and installation guidance.
How long does shower grout last?
Epoxy grout installed correctly in a shower can last 20–50 years without significant degradation — one documented real-world installation lasted 42 years with no cracking. Standard cement grout in a well-maintained shower (sealed annually) typically lasts 8–15 years before requiring repair or replacement. Poorly sealed or unsealed cement shower grout may need regrouting in 3–7 years. High-performance polymer-modified cement grout falls between standard cement and epoxy — 10–20 years with good maintenance. The lifespan difference between grout types is one of the strongest arguments for the epoxy upfront cost premium over a 15–20 year homeownership horizon.
Making the Right Decision for Your Shower
The decision framework for shower grout is straightforward once the technical factors are clear. For shower floors: epoxy grout — the performance advantage over cement in the highest-moisture, highest-wear surface is too significant to ignore, and the area of a shower floor is small enough that the material premium is rarely project-defining. For shower walls with narrow standard joints: unsanded polymer-modified cement grout — the performance of modern polymer-modified formulas is genuinely good, the installation is accessible to professionals and careful DIYers alike. For glass tile anywhere in the shower: fine-filler epoxy or unsanded grout only — sanded grout causes permanent damage. For all natural stone anywhere in a shower: seal first, then grout — regardless of whether epoxy or polymer-modified cement grout follows.
And whatever you choose for grout, remember that the waterproofing membrane behind the tile is what actually keeps a shower watertight. Excellent grout on an inadequately waterproofed substrate will fail. Our how to tile a shower step-by-step guide covers the complete technical sequence — substrate, waterproofing, tile, and grout — in a single comprehensive resource. For tile selection that informs your grout choice across every shower surface, our best tile for shower walls guide and porcelain vs ceramic vs natural stone comparison are the most useful next reads.