Two showers using the same tile, the same budget, and the same size can look completely different based on one thing: how the tile is laid. This guide covers all 12 patterns that genuinely transform a shower — from proven classics to 2026's most sought-after looks — with honest guidance on difficulty, spatial effect, and when each one works best.
The 12 shower tile patterns that truly transform a bathroom are: herringbone · horizontal brick bond · vertical stack bond · large-format slab · diagonal/diamond set · chevron · hexagon mosaic · basket weave · tile drenching · penny round mosaic · feature wall with field tile · mosaic accent strip.
Each pattern creates a different spatial effect — some add height, others widen, others create immersive luxury. The pattern you choose matters as much as the tile itself. This guide explains what each one does, where it works best, how hard it is to install, and which tile types suit each layout.
Most bathroom renovations start with choosing a tile. Color, material, finish — homeowners spend hours on these decisions and relatively little time on how that tile will actually be laid. That's a missed opportunity, because the layout pattern is often what does the most transformative work in a shower. A 3×6 subway tile installed in a standard horizontal brick pattern is familiar and safe. That same tile rotated 90 degrees and stacked vertically suddenly feels contemporary and architectural. Neither tile changed — only the pattern.
Understanding what each pattern achieves, and which spatial problem it solves, is how you make a decision that turns a functional shower into a space you genuinely love walking into. This guide covers all twelve of the most impactful shower tile patterns, organized from the most accessible and timeless to the most design-forward, with everything you need to choose, plan, and execute the right layout for your space.
📊 Pattern Choice Has Measurable Impact: According to the NKBA's 2024 Design Trends Report, 68% of bathroom remodelers cited tile pattern as a significant factor in their satisfaction with the finished result — more than tile color alone. Angi's 2026 installation data confirms that complex patterns (herringbone, chevron, diagonal) add 10–20% to labor costs, but the design return almost always exceeds that premium for mid-range and luxury renovations.
Before we go pattern by pattern, one important note: regardless of which layout you choose, every shower tile project starts with proper waterproofing. The most beautiful herringbone installation will fail within years without a correct membrane behind it. Our complete how to tile a shower step-by-step guide covers every technical requirement before you touch a single tile.
Timeless Patterns That Always Deliver (1–4)
These four layouts have earned permanent status in American bathroom design because they work across tile materials, bathroom sizes, and design styles. They're not chasing trends — they're the foundation that trends keep returning to. If you want a shower that looks considered and beautiful in 2026 and still looks considered and beautiful in 2036, start here.
Herringbone
Classic · Feature Walls · Floor & WallIf there's one pattern that consistently turns a basic shower into something genuinely memorable, it's herringbone. The interlocking V-shaped zigzag — formed when the short end of one rectangular tile meets the long side of the next at 90 degrees — creates a surface with organic movement, visual depth, and a quality that reads as both artisan and architectural. It has been used in Roman roads, French parquet floors, American bathrooms, and English country kitchens for centuries. It keeps coming back because it works.
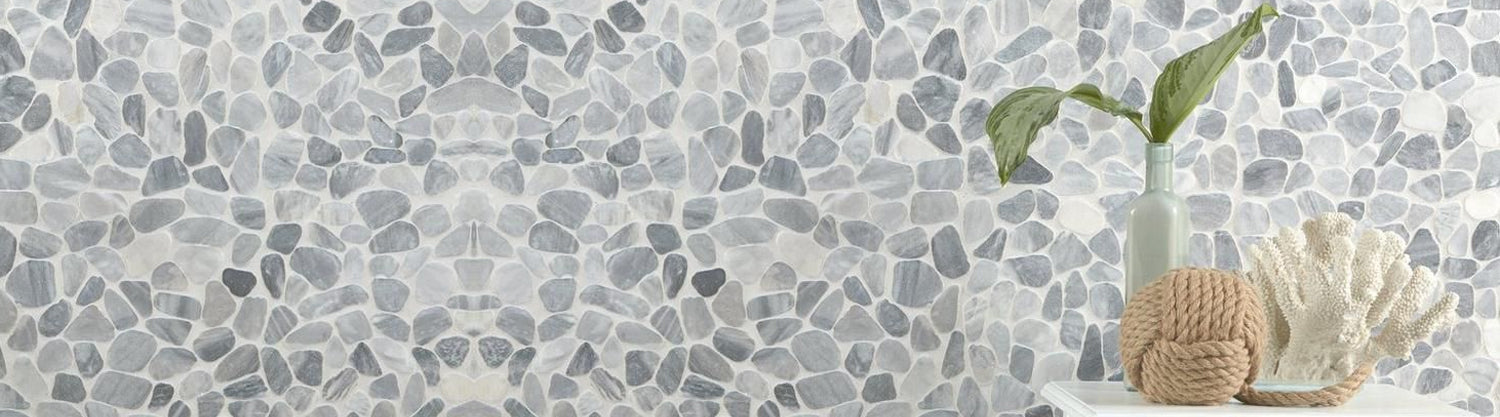
On a shower feature wall, herringbone in a natural stone mosaic — cream marble, grey stone, warm travertine — creates what is probably the most consistently beautiful shower wall pattern in current US residential renovation. The V-shaped rhythm draws the eye naturally without overwhelming the space. It adds texture and visual complexity without adding visual clutter. And it works equally well in traditional, transitional, and contemporary bathroom designs, which gives it unusual versatility. Our full herringbone stone mosaic tile collection shows the range of stone types and colorways available.
Herringbone works beautifully on shower floors too — particularly in natural stone or pebble stone mosaic format, where the organic surface provides excellent grip and the pattern creates a richly detailed floor underfoot. For the full range of herringbone design ideas, pairings, and installation guidance, our herringbone tile pattern ideas guide covers every application in depth. For a direct comparison of herringbone versus the similar chevron pattern, our chevron vs herringbone guide clarifies the differences clearly.
Horizontal Brick Bond (Subway Straight Stack)
Most Popular · Accessible · Material-DrivenThe horizontal brick bond — each row offset by half a tile width, exactly like a brick wall — is the most installed shower tile pattern in the United States, and its dominance is fully deserved. It's reliable, forgiving to install, works with every tile format from 3×6 ceramic to 24-inch porcelain planks, and it lets the tile itself do the design work. The familiar horizontal rhythm creates a sense of solidity and width that suits almost every bathroom.
What the brick bond lacks in visual drama it delivers in flexibility. A classic white 3×6 glazed ceramic in this pattern is one of the most enduringly appealing bathroom looks available. A deep forest green or charcoal subway tile in the same brick bond suddenly becomes a bold statement. The pattern accommodates both equally. This is its defining strength — it's a canvas, not a statement. Our dedicated resource on bathroom subway tile designs that never go out of style shows how dramatically the same brick bond pattern changes with tile choice, size, and grout color. Our subway mosaic tile collection also offers pre-mounted options that simplify installation.
One refinement worth knowing: a 1/3 offset (each row shifts one-third rather than half a tile width) creates a slightly more contemporary feel and avoids the long vertical grout lines that can make standard 1/2-offset brick bond look like a commercial bathroom in large-format tiles.
Vertical Stack Bond
Contemporary · Height-Adding · UnderutilisedTake the same rectangular tile used for a horizontal brick bond, rotate it 90 degrees, and stack it so the long edge faces horizontally and all grout joints run perfectly plumb. The result is one of the most underused, most effective shower tile patterns available — an architectural, contemporary look that makes ceilings feel taller, spaces feel more open, and any shower feel considerably more intentional. Same tile, completely different room.
Vertical stack bond is especially powerful in bathrooms with standard 8-foot ceilings, where the strong upward visual pull of the vertical orientation genuinely creates the illusion of additional height. In narrow shower stalls — 32 or 36 inches wide — it opens the space in a way that horizontal patterns can't. Interior designers have championed this layout for years precisely because the transformation is so disproportionate to the change involved. Our vertical subway tile shower designs guide covers the full range of applications with expert layout guidance.
The one requirement: tiles must be genuinely rectangular (subway proportion or plank format) for the elongating effect to read clearly. Square tiles in vertical stack don't achieve the same spatial result — the proportional difference between height and width is what creates the visual lift.
Large-Format Slab / Continuous Panel
Modern · Minimal · Spa-Hotel QualityLarge-format tiles — 12×24 and above, through to full-height porcelain slabs — installed with minimal grout joints create the defining contemporary shower aesthetic of 2026. The near-absence of grout lines transforms shower walls into something approaching a continuous surface, producing the spa-hotel atmosphere that's become the benchmark aspiration for American bathroom renovation. It is the pattern choice for homeowners who want "effortlessly luxurious" as the dominant quality of their shower.
The practical payoff beyond aesthetics is significant: fewer grout joints mean dramatically less cleaning and sealing over the life of the shower. The primary source of mold and maintenance effort in tiled showers is grout, and large-format installation reduces that exposed grout surface area by 70–80% compared to standard subway tile. Long-term, large-format showers are genuinely easier to live with. For a detailed comparison of materials in large format, our marble vs porcelain tile guide covers cost, performance, and maintenance side by side.
The critical installation requirement: a perfectly flat substrate. Any bump, hollow, or unevenness in the backer board shows through large-format tiles as tile lippage — where adjacent tiles sit at different heights — in a way that smaller tiles conceal. Large-format slab installation requires professional expertise. For the full walk-in shower context where this pattern shines most, our walk-in shower tile patterns and colors guide is the definitive companion resource.
Pattern-Forward Layouts That Make a Statement (5–8)
These four patterns are for showers designed to be noticed. Each creates genuine visual drama — through geometric precision, directional energy, decorative intricacy, or unexpected orientation. They require more planning and in some cases more investment, but the results are the kind that stop guests mid-conversation and make a bathroom feel custom-designed rather than simply renovated.
Diagonal / Diamond Set
Rotating any square or rectangular tile 45 degrees creates an immediately more energised, dynamic surface. The diagonal orientation draws the eye in multiple directions at once — creating movement and visual interest that straight-set tile simply cannot produce. It also has a well-documented spatial effect: diamond-set tile makes rooms feel wider, which is particularly valuable in narrow shower stalls.
Diamond-set white or cream tile on shower walls is a classic American approach that feels simultaneously traditional and enduringly chic. In a contemporary context, large-format porcelain on the diagonal with a thin dark grout line creates a striking, graphic surface. The pattern also has the practical advantage of visually disguising minor wall imperfections — the diagonal orientation catches light differently than straight-set tile and is more forgiving of substrate irregularities.
The honest caveat: diagonal installation generates 20–25% more waste than straight-set because every perimeter tile requires an angled cut at the wall edge. Order materials accordingly and budget for the additional labor time.
✔ Order 20–25% material overage for diagonal — the angled perimeter cuts create significantly more waste than straight-set installations.
Chevron
Where herringbone creates a broken, staggered zigzag, chevron creates a continuous, unbroken V-shape — tiles cut at 45-degree mitered angles that meet point-to-point to form a seamless arrowhead pattern. The result is sharper, more graphic, and more directional than herringbone. It draws the eye powerfully along its axis and creates a strong, modern geometric statement that reads as thoroughly designed rather than simply tiled.
Vertical chevron on a shower feature wall elongates the space and makes ceilings feel taller. Horizontal chevron creates a bold architectural statement that suits contemporary and minimalist bathroom designs. Both orientations deliver more visual energy than their herringbone equivalents, which is a strength for bold design schemes and a consideration for smaller bathrooms where that energy can feel overwhelming. Browse our pencil and chevron tile collection for ready-to-install chevron format options. For a full design comparison, our chevron vs herringbone guide covers every scenario.
The installation requirement that matters most: chevron requires precisely angled tile cuts — standard rectangular tiles need custom cutting at 45 degrees to create the continuous V-shape. Buying pre-cut chevron tiles or pre-assembled chevron mosaic sheets dramatically simplifies installation and improves accuracy.
✔ Pre-assembled chevron mosaic sheets eliminate the need for individual angled cuts — recommended for any DIY chevron installation.
Hexagon Mosaic
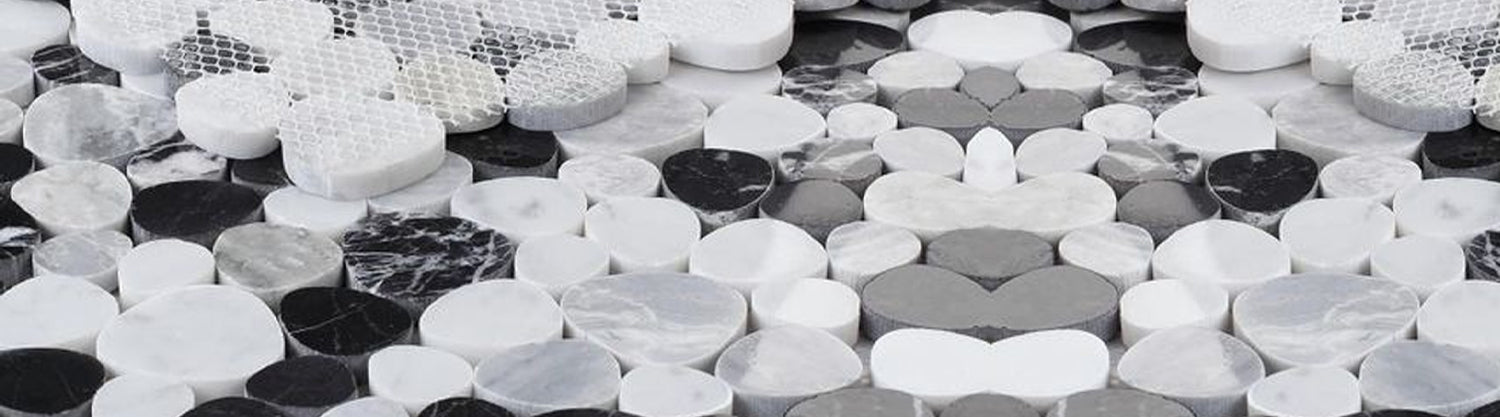
Six-sided tiles arranged in honeycomb formation sit at the intersection of geometric precision and organic charm. They're more structured than free-form pebble mosaics and more interesting than a standard square grid. Hexagon mosaics work on both shower floors and walls, and they're among the most versatile and design-adaptable patterns in tile.
For shower floors specifically, hexagon mosaic's high grout-joint density provides excellent natural slip resistance — the grout joints act as traction channels underfoot, meeting ANSI DCOF wet-area requirements naturally. For walls, larger hexagon formats create a graphic, architectural surface that suits contemporary bathroom design. Small black hexagons on a shower floor against white walls is one of the most consistently strong classic-modern shower combinations. Explore the full range in our hexagon mosaic tile collection. Our dedicated guide to choosing hexagon mosaic tiles covers every sizing, spacing, and material consideration.
✔ For shower floors: centre the hexagon layout around the drain and work outward. This creates the most professional-looking result and ensures the pattern relationship with the drain feels intentional.
Basket Weave
The basket weave alternates groups of parallel tiles in perpendicular directions — mimicking an actual woven basket — to create a textured, interlocking geometric surface with significant decorative character. It has been used in American bathrooms since the Victorian era and has the unusual quality of feeling both genuinely vintage and thoroughly contemporary when executed in modern materials.
Traditional basket weave uses small rectangular tiles grouped in pairs or trios that alternate horizontal-vertical. More complex versions pair different tile sizes or materials — a large field tile alternating with mosaic inserts — to create layered, tactile surfaces. On shower floors it adds a premium decorative quality that makes the floor a true design feature. On accent walls it creates the kind of surface that rewards close inspection — details that reveal themselves gradually rather than announcing themselves immediately. For practical application and pairing ideas, see our mosaic bathroom floor tile ideas guide.
✔ Best used on floors or as a feature accent rather than full-wall coverage — basket weave in large amounts can feel repetitive. Use it as a focal area and let simpler tile carry the remaining surfaces.
Design-Forward Patterns for Maximum Impact (9–12)
These final four patterns represent the most transformational approaches on this list. Each one changes not just how a shower looks but how it feels to be in it. They demand more planning and in some cases more investment — but the results are the kind that make a bathroom feel genuinely extraordinary rather than simply well-finished.
Tile Drenching — Floor-to-Ceiling Immersion
2026's Defining Trend · Spa-Like · ImmersiveTile drenching — wrapping the same tile continuously across the shower floor, all walls, and the ceiling — is the single most discussed shower design approach in 2026 US bathroom renovation. The idea is simple: remove every visual interruption between surfaces by treating the entire shower interior as one continuous material. The result is an immersive, cocoon-like environment that genuinely feels like a private spa rather than a domestic shower. When it works, it's transformative.
The approach works best with tiles that have organic warmth or natural character — earthy terracotta, warm stone, sandy beige, soft sage green — where an all-enveloping quality creates atmosphere rather than monotony. Large-format tiles drenched across all surfaces minimise grout lines across the entire shell, amplifying the seamless quality that makes the pattern so compelling. Smaller mosaic tiles or natural stone wrapped across all surfaces create a different but equally powerful effect — intimate, textured, and richly tactile.
For small showers, tile drenching in a light tone is one of the most effective space-expanding techniques available. The complete absence of visual interruptions — no transition between floor and wall, no change of material, no break in the surface — makes a compact shower read considerably larger than its actual dimensions. Our shower tile ideas for small spaces covers this approach with specific layout guidance. For the full walk-in shower context, our walk-in shower tile ideas guide provides comprehensive design direction. For the complete spa bathroom philosophy behind this approach, see our spa-inspired bathroom retreat guide.
✔ Design Tip: If you love the drenched look but want subtle zone differentiation, use the same tile on floor and walls but apply a slightly different grout joint width — wider on the floor (1/8"), tighter on walls (1/16"). The material stays continuous but the eye registers a subtle change that makes each surface feel considered.
Penny Round Mosaic
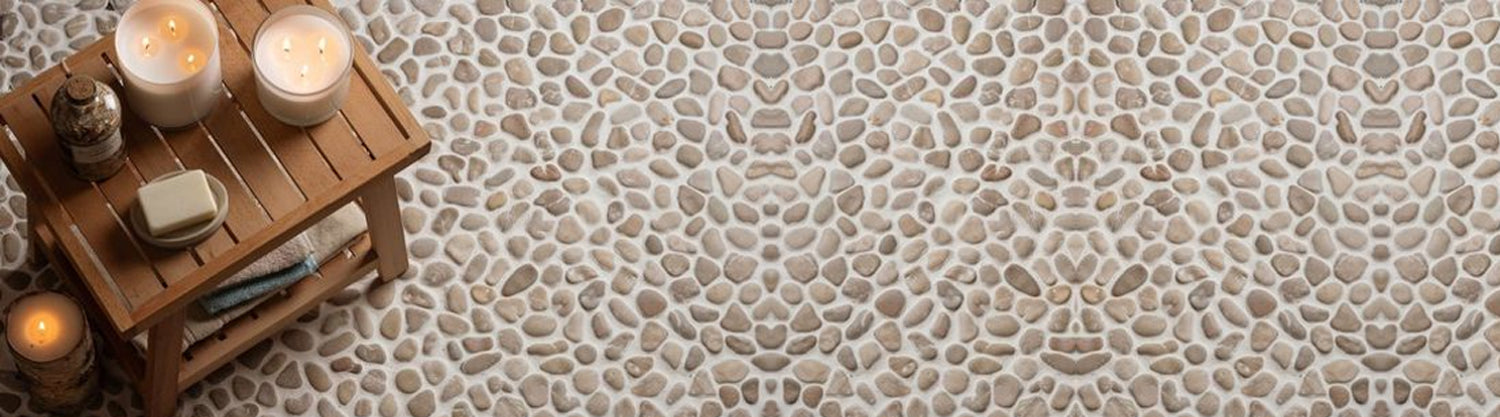
Artisan · Slip-Resistant · American ClassicSmall circular tiles — typically 1 inch in diameter — arranged in offset rows on mesh backing. Penny round mosaic is one of the most enduringly popular shower floor patterns in American bathroom design, and its appeal makes complete sense: the rounded shapes create a surface with playful, handcrafted character that no rectangular tile pattern can replicate. They read simultaneously as vintage (early 20th-century American bathrooms used penny rounds extensively) and thoroughly contemporary in a well-designed modern bathroom.
The high density of grout joints in a penny round installation provides exceptional slip resistance — a practical advantage that's made them a go-to shower floor choice for over a hundred years. The same quality means slightly more grout surface to maintain, though with epoxy grout the cleaning commitment is minimal. A penny round mosaic shower floor paired with clean large-format porcelain walls is one of the most consistently beautiful and balanced bathroom design combinations available.
In 2026, penny rounds are being reinterpreted in glazed pebble tile format — the organic roundness of natural stone combined with a warm glaze finish creating shower floors that feel both natural and designed. Deep jade, warm amber, and dusty sage penny rounds are among the most striking options for contemporary feature floor applications. For broader mosaic floor inspiration, our top mosaic bathroom floor tile ideas covers penny rounds alongside other mosaic formats with real examples. Our bathroom mosaic design ideas guide explores how they work across the wider bathroom scheme.
✔ Design Tip: Contrasting grout on penny rounds makes the circular pattern itself a visual feature — dark grey grout with white penny tiles creates a bold, graphic quality that references Art Deco and 1920s American bathroom design, and it looks striking in both traditional and contemporary contexts.
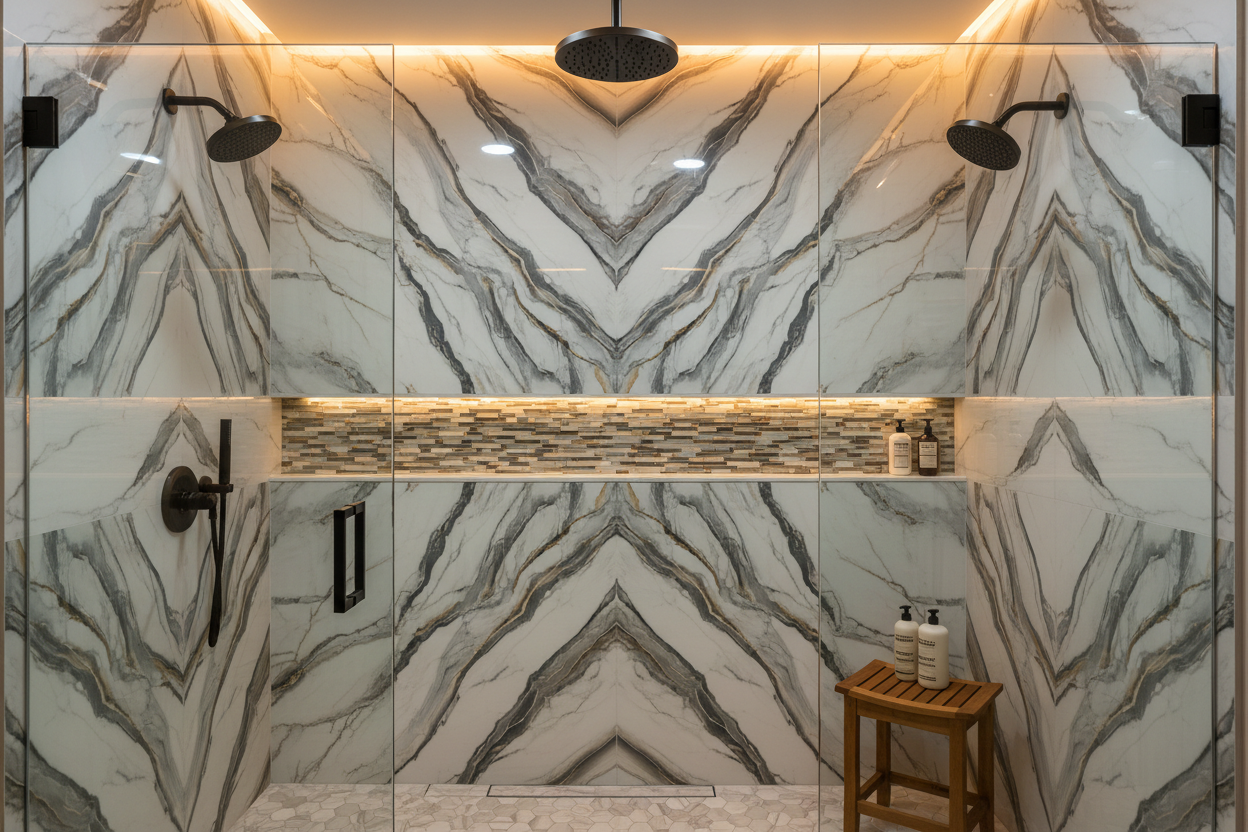
Feature Wall + Complementary Field Tile
High Impact · Budget-Efficient · Designer ThinkingOne premium or patterned tile on the back wall — the wall that's visible from the bathroom doorway — with a simpler, complementary tile on the remaining three walls. This is the most cost-efficient route to a genuinely designer-quality shower. You're buying two to three times less of your premium tile than a full surround would require, while the feature wall does essentially all of the visual work. A bathroom with one extraordinary wall and three excellent walls almost always reads as more intentional and more designed than one with four identical walls.
The back wall is the natural choice for the feature: it's the first thing you see when you enter the bathroom, it anchors the shower visually, and it's the wall that appears in photographs. Put something genuinely beautiful there — a cream herringbone stone mosaic, a panel of Calacatta marble mosaic, a deep-toned glass tile in an unexpected color, or a dramatic large-format stone-look porcelain — and keep the surrounding walls in a complementary neutral that supports rather than competes with it.
The material pairing that works most consistently: a natural stone mosaic feature wall with a large-format porcelain field tile in a closely related tone. The contrast between the textured, organic mosaic and the clean minimal field tile creates one of the defining visual relationships in contemporary bathroom design. Our shower tile material comparison helps navigate field tile selection for this pairing. For additional feature wall tile inspiration, our top shower tile ideas guide is worth exploring.
✔ Design Tip: Match the dominant tone of your feature wall tile to the field tile rather than contrasting colors strongly — let pattern and texture create the difference, not a color clash. Two tiles in similar tones that vary in texture and scale create a more sophisticated relationship than two tiles in contrasting colors.
Mosaic Accent Strip
Architectural Detail · Low Cost · High ReturnA horizontal band of mosaic or decorative tile at a specific height within a larger field tile installation. Typically 3–6 inches wide and positioned at approximately 60 inches from the floor — shoulder height, where the eye naturally lands — the accent strip adds a layer of architectural detail that changes how the entire shower reads. It's the difference between a tiled box and a space with considered proportions and deliberate visual rhythm.
The logic is the same as a chair rail or dado rail in traditional interior architecture: a horizontal element that divides a wall into zones, adds rhythm, and signals design intention. In a shower, the mosaic strip at the right height does exactly this. It also solves one of the most common renovation challenges: what to do with a shower that uses a simple, affordable field tile but needs something to make it feel elevated. The strip provides that elevation for a fraction of the cost of replacing the field tile itself.
The most effective accent strip materials have genuine texture, organic character, or material contrast with the surrounding field tile. Options from our collections include flower stone mosaic, natural pebble tile borders, and glass pencil liner tiles — all of which create a finished, considered accent without requiring demolition of the existing field tile. Our dedicated pebble tile borders guide covers how to select and install accent strips effectively. Our sliced white pebble tile border design ideas offers specific layout inspiration for one of our most popular border options.
✔ Design Tip: Position the accent strip at eye level — approximately 60 inches from the floor for average standing height. Too low and it reads as a baseboard; too high and it loses the room-dividing architectural quality that makes it effective. The height relationship with surrounding tile is everything.
All 12 Patterns: Head-to-Head Comparison
| # | Pattern | Spatial Effect | Best Application | Difficulty | Waste % | 2026 Popularity |
|---|---|---|---|---|---|---|
| 1 | Herringbone | Adds depth & texture | Feature walls, floors | Moderate | 10–15% | ⭐⭐⭐⭐⭐ |
| 2 | Horizontal Brick Bond | Neutral — material leads | Full walls, tub surrounds | Easy | 10% | ⭐⭐⭐⭐⭐ |
| 3 | Vertical Stack Bond | Makes ceilings feel taller | Low ceilings, narrow showers | Easy | 10% | ⭐⭐⭐⭐ |
| 4 | Large-Format Slab | Expansive, spa-hotel feel | Walk-in showers | High | 15% | ⭐⭐⭐⭐⭐ |
| 5 | Diagonal / Diamond | Makes rooms feel wider | Full walls, floors | Moderate-High | 20–25% | ⭐⭐⭐ |
| 6 | Chevron | Strong directional pull | Feature walls, accents | High | 15–20% | ⭐⭐⭐⭐ |
| 7 | Hexagon Mosaic | Geometric + slip resistance | Floors, feature walls | Moderate | 10% | ⭐⭐⭐⭐⭐ |
| 8 | Basket Weave | Rich decorative texture | Floors, accent areas | High | 15% | ⭐⭐⭐ |
| 9 | Tile Drenching | Immersive spa cocoon | Entire shower envelope | Moderate | 10–15% | ⭐⭐⭐⭐⭐ |
| 10 | Penny Round Mosaic | Artisan, handcrafted quality | Shower floors, niches | Moderate | 10% | ⭐⭐⭐⭐ |
| 11 | Feature Wall + Field Tile | Creates a clear focal point | All shower types | Varies | 10–20% | ⭐⭐⭐⭐⭐ |
| 12 | Mosaic Accent Strip | Architectural zone detail | Any existing tile layout | Easy-Moderate | 5–10% | ⭐⭐⭐ |
How to Choose the Right Pattern for Your Specific Shower
The clearest way to narrow down twelve options is to identify the spatial problem you're solving or the quality you most want to create, and match the pattern to that priority rather than simply choosing what looks best in isolation.
Your shower feels too small or cramped
Large-format tiles with minimal grout joints are the most effective single intervention — fewer visual interruptions make surfaces feel larger and more continuous. Tile drenching in a light colour eliminates all visual breaks between floor, walls, and ceiling. Vertical stack bond creates height. Diagonal set creates width. Our tile shower ideas for small bathrooms guide covers every space-expanding technique with specific layout recommendations.
Your shower has low ceilings or feels compressed
Vertical stack bond is the most direct tool — the strong upward visual rhythm of vertical tile orientation genuinely makes ceilings feel taller without any structural change. Vertical chevron amplifies this effect further. Both avoid the horizontal emphasis that reinforces the sense of a low ceiling.
You want a spa or luxury atmosphere
Tile drenching, large-format slab installation, or a herringbone stone mosaic feature wall all create immersive, hotel-quality atmospheres. Natural stone or stone-look porcelain in these patterns reinforces the organic luxury quality. The spa bathroom guide covers the full design philosophy in detail.
You want design impact on a constrained budget
The mosaic accent strip (Pattern 12) and feature wall with field tile (Pattern 11) deliver the best return on design investment. Use affordable ceramic or porcelain for 80% of the shower, then invest in something genuinely beautiful — a natural stone mosaic, a glass accent tile, a glazed artisan tile — for the remaining 20%. The result often reads as more designed than a uniform installation in expensive tile throughout. Our stone mosaic tile collection and pebble tile borders offer a range of feature and accent options at accessible price points.
You want something that won't feel dated in 10 years
Herringbone, horizontal brick bond, hexagon mosaic, and large-format slab have all been used beautifully in American bathrooms for decades and show no signs of receding. The patterns that date most readily are those tightly tied to a specific trend moment — highly graphic prints, unusual color combinations, or very niche material references. If longevity matters, express your personal style through material choice (natural stone vs. porcelain, warm vs. cool tones, matte vs. glossy) and let the layout remain within the proven range. See our 2026 bathroom tile design trends guide for what's rising, what's sustaining, and what's fading.
✔ Always Dry-Lay Before You Set: Every pattern on this list produces a better result when you dry-lay the tiles on the floor in front of the wall before mixing any thinset. This reveals where partial tiles fall at corners and edges, identifies any layout problems, and lets you shift your starting position to avoid ugly sliver cuts at the most visible spots. It takes 15–20 minutes and prevents hours of installation regret.
⚠ Pattern Complexity Amplifies Both Good and Bad Installation: A precisely installed herringbone is breathtaking. A poorly installed herringbone — drifting joints, inconsistent grout widths, sliver cuts at the wrong positions — looks worse than a basic straight stack. The more complex the pattern you choose, the more critical it is to plan thoroughly and execute carefully. Our common tile installation mistakes guide is worth reading before starting any pattern-forward project.
The Role Grout Plays in Every Pattern
Grout color is a pattern decision, not an afterthought. The choice of grout changes the character of every layout on this list more dramatically than most homeowners expect until they see it installed.
Matching grout to tile (same or very similar tone) creates a continuous, texture-forward surface where the tile material takes center stage and the pattern recedes. This approach suits natural stone tiles, where the organic beauty of the stone itself is the point, and large-format installations where minimal visual interruption is the goal.
Contrasting grout (dark grout on light tile, light grout on dark tile) makes the pattern geometry itself a visible design element. In a herringbone installation with contrasting grout, the V-shaped grid becomes as much a part of the visual statement as the tile. In a hexagon mosaic with contrasting grout, the honeycomb becomes the dominant visual feature. This is a powerful approach used intentionally — and an overwhelming one when it happens by accident.
For shower applications specifically, we recommend epoxy grout for floors and sanded cement grout with proper sealing for walls. Epoxy is non-porous, never needs sealing, and resists mold and staining better than any cement grout. For the full technical breakdown of grout selection for shower applications, our sanded vs unsanded grout guide covers every scenario clearly.
Frequently Asked Questions
What is the most popular shower tile pattern in 2026?
Tile drenching — running the same tile continuously across the shower floor, all walls, and ceiling — is the defining shower design approach of 2026 in the US, appearing consistently across every major design trend report. Alongside it, large-format slab installation with minimal grout joints and herringbone stone mosaic feature walls are the most sought-after patterns in premium renovation. For budget-conscious projects, vertical stack bond continues to gain significant ground as a zero-cost-change to any standard subway tile layout that delivers a genuinely contemporary result.
What tile pattern makes a shower look bigger?
Large-format tiles with minimal grout joints are the most powerful single intervention — fewer visual interruptions make surfaces read as more continuous and expansive. Vertical stack bond draws the eye upward, making ceiling height feel greater. Tile drenching in light colors eliminates all zone transitions. Diagonal set makes rooms feel wider. The patterns to avoid in small showers are those with strong color contrasts or busy geometric complexity — these fragment the space visually and make it feel smaller rather than larger.
Is herringbone hard to tile in a shower?
Herringbone is moderate difficulty — more demanding than a standard brick bond but accessible to a careful DIYer with proper planning. The main challenges are maintaining consistent 90-degree angles throughout the installation and handling the angled perimeter cuts at wall edges. Pre-mounted herringbone mosaic sheets (mesh-backed) dramatically reduce difficulty by pre-setting all the angles and relationships — these are the recommended approach for any DIY herringbone project. Budget 10–15% material overage for cuts and waste.
Can I mix two patterns in one shower?
Yes — strategic mixing is exactly how the best showers are designed. The most effective combinations: herringbone stone mosaic feature wall with large-format porcelain on side walls; penny round mosaic floor with vertical stack bond walls; mosaic accent strip at eye level within a standard horizontal brick bond. Two rules govern successful mixing: keep the color palette consistent across all tiles (2–3 tones maximum), and let one pattern dominate while the other accents. Patterns competing at equal visual weight in a small space create confusion rather than interest.
What's the easiest shower tile pattern for a beginner to install?
Horizontal brick bond (standard subway offset) and vertical stack bond are the most DIY-accessible patterns on this list — both use standard rectangular tiles with no angled cuts on the main field, and both are forgiving of minor layout adjustments. The mosaic accent strip is also straightforward since pre-mounted mesh sheets handle the pattern consistency. The most demanding patterns for first-time installers are chevron (requires precise angled cuts), large-format slab (requires perfectly flat substrate), and diagonal set (generates significant waste from perimeter cuts).
Does the tile pattern affect resale value?
Yes, though the relationship is nuanced. Timeless patterns — herringbone, brick bond, hexagon mosaic, large-format slab — have the broadest appeal to potential buyers and are unlikely to feel dated or personalised. Very trend-specific or highly individual patterns carry more risk of seeming either dated or overly specific to the current owner's taste. The feature wall approach is particularly smart from a resale perspective: it demonstrates clear design intention without imposing a strong personal statement on the entire space. NKBA research consistently shows spa-like bathrooms with quality tile work among the highest-value bathroom renovation investments for resale.
What's the difference between herringbone and chevron in a shower?
Herringbone uses standard rectangular tiles at 90-degree angles — the short end of one tile meets the long side of the next, creating a broken, staggered zigzag with organic, textile-like quality. Chevron uses tiles cut at precise 45-degree angles that meet point-to-point, creating a continuous, unbroken V-shape with sharper, more graphic lines. Herringbone is more forgiving to install and works with any standard rectangular tile. Chevron requires pre-cut chevron tiles or custom cutting. Herringbone adds texture and depth; chevron adds directional energy and graphic precision. Our chevron vs herringbone guide covers every design and installation distinction in detail.
How do I choose between a feature wall and full tile coverage?
Consider three factors: budget, the quality of your field tile, and what story you want the shower to tell. If your budget allows a premium tile throughout, full coverage in a beautiful material with a timeless pattern (herringbone, large-format, tile drenching) creates the most immersive result. If your budget is more constrained, the feature wall approach — a stunning tile on one wall, a well-chosen complementary tile on the others — achieves comparable design impact for significantly less money. Full coverage with a standard field tile and no accent is the outcome to avoid; it's the approach most likely to produce a forgettable result regardless of the pattern used.
What tile pattern works best for a walk-in shower?
Walk-in showers have more wall surface and physical presence than standard stall showers, which means they can carry bolder patterns more confidently. Large-format slab installation is particularly effective in a walk-in because the scale of the tiles relates proportionally to the larger shower dimensions. Tile drenching in a walk-in creates a genuinely immersive spa atmosphere. Herringbone on the back wall of a walk-in, visible from the bathroom entrance, creates a strong visual anchor. For a thorough exploration of every layout option for walk-in showers, our walk-in shower tile ideas for a contemporary look covers patterns, colors, and materials in full.
The Pattern That Transforms Your Bathroom Is the One That Solves Your Actual Problem
Every pattern on this list has genuine transformational potential — but it works best when it's matched to what your specific shower actually needs. A shower that feels cramped needs a pattern that creates space. A shower with low ceilings needs a pattern that adds height. A shower with a constrained budget needs a pattern that concentrates impact. A shower that needs to look beautiful in 2036 needs a pattern with staying power. The pattern that checks your specific box will always outperform a more dramatic pattern that doesn't.
Start with your spatial priority. Then choose the pattern. Then choose the tile material and color that suits both the pattern and your broader design direction. That sequence — problem, pattern, material — almost always produces better decisions than starting with a tile you love and working backwards. And whichever pattern you choose, the technical foundation matters as much as the design decision. Our complete how to tile a shower step-by-step guide covers waterproofing, substrate, layout planning, thinset, grouting, and sealing — everything your chosen pattern needs to look as good in fifteen years as it does the day it's installed.
Find Your Perfect Tile for Any of These 12 Patterns at Tile Hub
We carry natural stone herringbone mosaics, hexagon tiles, penny rounds, pebble tile borders, glass pencil liners, Calacatta marble mosaics, subway tile, and much more — everything you need for any pattern on this list. Sample ordering available before full commitment so you can see the tile in your own bathroom before you buy.
Shop Herringbone Mosaics Shop Stone Mosaics Browse All Tile at Tile Hub →